Easy to Install STORM WINDOWS
Introducing: Storm Snap™ Storm Windows
We offer both inside and outside Storm Snap™ frames for your home.
Safety Shields
INNER1.25 Installation Video
OUTER1.25 Exterior Install
Un-assembled Inner1.25 Video
The “un-assembled” frame with rolled up Polycarbonate lens is the most economical way to get the Storm Snaps. Free shipping for ANY size or quantity of frames. Easy, lightweight install, super insulating results, guaranteed ! Above video is 1 minute, but actual time to unpack and assemble and install the frame and lens is 6 minutes.
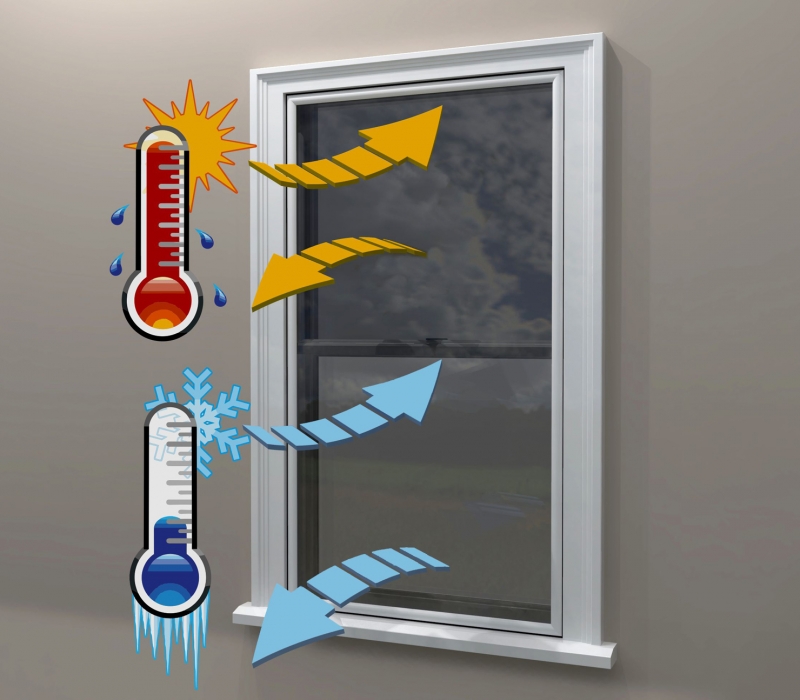
Wintertime: Our inner storm snap can help retain up to 75 percent of your home’s heat in the winter.
Summertime: Our inner storm windows directly reduce direct heat radiation by deflecting hot solar heat rays, and will reduce cooling loss by up to 40%.
On single pane windows, Inner frames can reduce heat loss by up to 85%. On a double pane windows, heat loss is estimated to be cut at around 40%.
Noise reduction: Storm Snaps frame + lens will reduce noise entering your living area by up to 60%.
How will Storm Snap™ storm windows benefit me ?
Inside and Outside Mount Storm Snaps™ : features common to both styles:
Utility Bill Savings
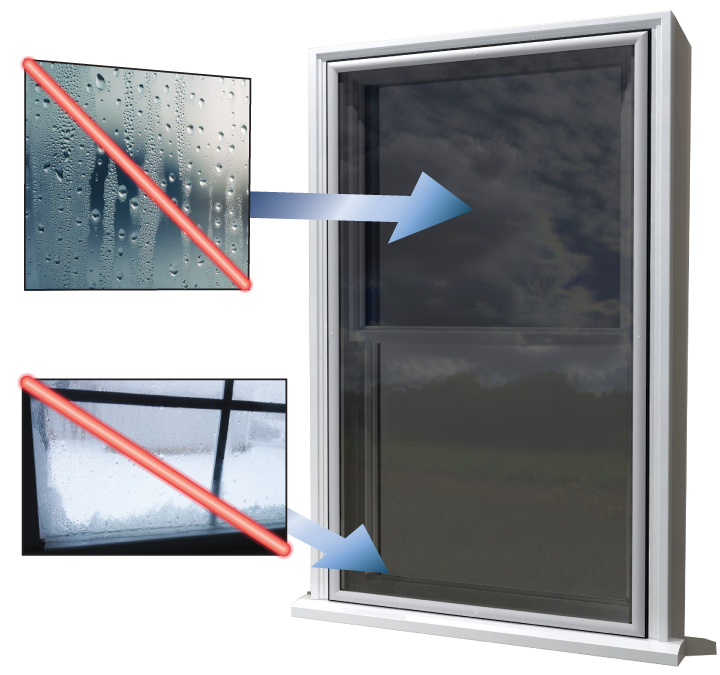
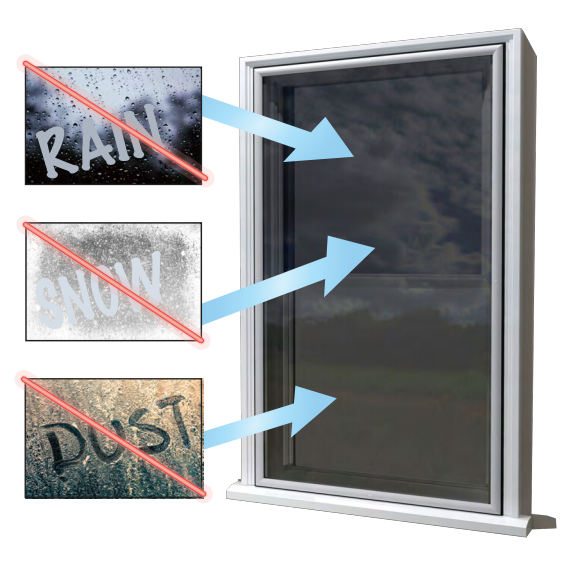
Easy press fit or screw on (for exterior frames) installation will save you a lot on heating and cooling bills and reduce or eliminate drafts. Storm Snaps™ create that dead air pocket between your outside window for great utility bill savings. If you’re installing the exterior storm only, the dead air pocket is between the exterior Storm Snap™ and your exterior window. If you’re installing an inside Storm Snap™, the dead air pocket is between the inside of your exterior window and your interior Storm Snap™. You can buy our inside or outside or both for “double” the protection.
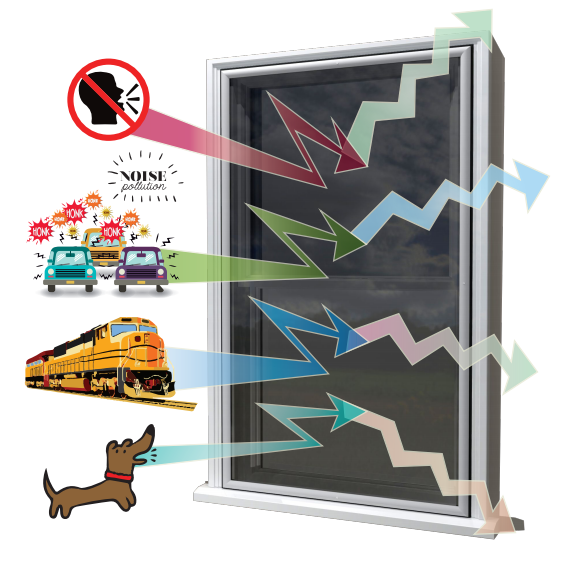
Outside Noise Reduction
The dead air pocket created by using either inside or outside Storm Snaps™, or both, will reduce outside street sounds from cars, people talking, sirens, airplane noise, etc.. You will have a quieter home inside. A thicker .220 lens offers better sound reduction then a thinner lens.
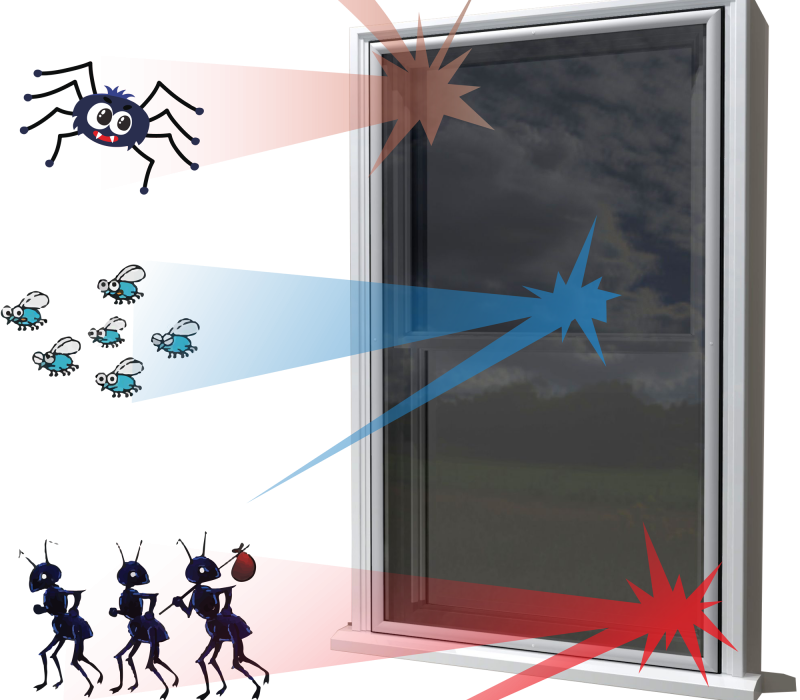
Keep Bugs and Spiders Out
Tiny bugs and spiders can enter your house through the tiniest cracks and spaces around exterior window frames. Storm Snaps™ add an additional barrier to help keep them out of your house. Our tight seal will reduce or eliminate the entry of tiny bugs and spiders into your house.
Outside Mount Storm Snaps™ Additional Features
No Need to Buy Expensive Replacement Windows
Using our Storm Snap™ storm windows, whether inside or outside OR both, you don’t need to buy expensive new windows. Leave your original/historic windows in place. Our Storm Snaps™ will turn your original single pane windows into “double insulated” windows for big energy bill savings. Our frames are more attractive than the storm windows found in your local big box hardware chain.
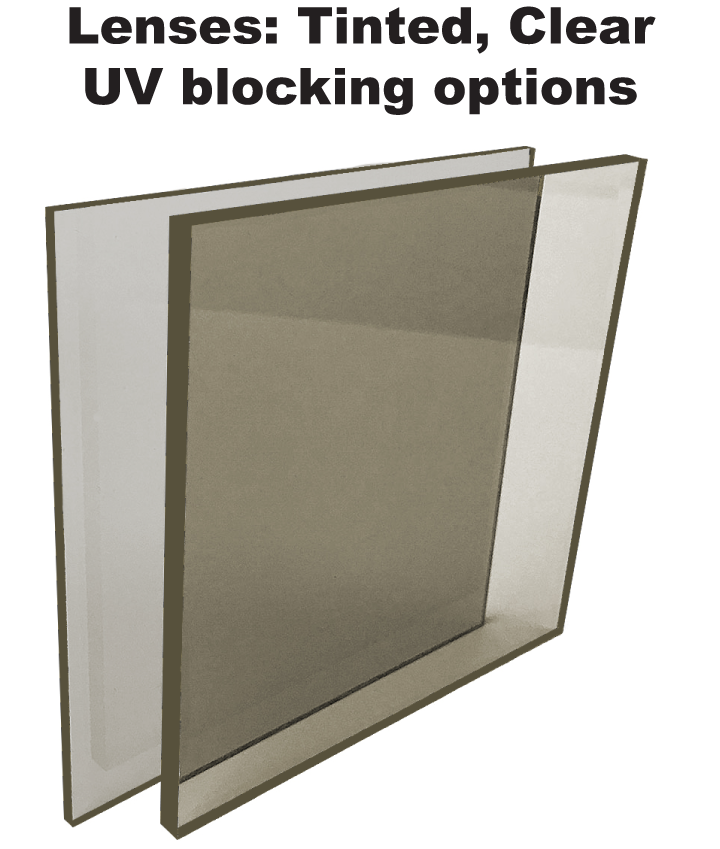
One Frame Offers Several Lenses for Different Seasons and Weather Situations
During summer use, you can buy tinted lenses from us to reduce solar/sun glare to keep searing and damaging heat from fading your window frames, inside carpets and furniture. Primarily for keeping summer heat out of your house. For winter, you can have a clear UV filtering lens for the winter to bring in the free heat, but reduce UV damage. We can make custom sized screens as well that will fit nicely into our frames
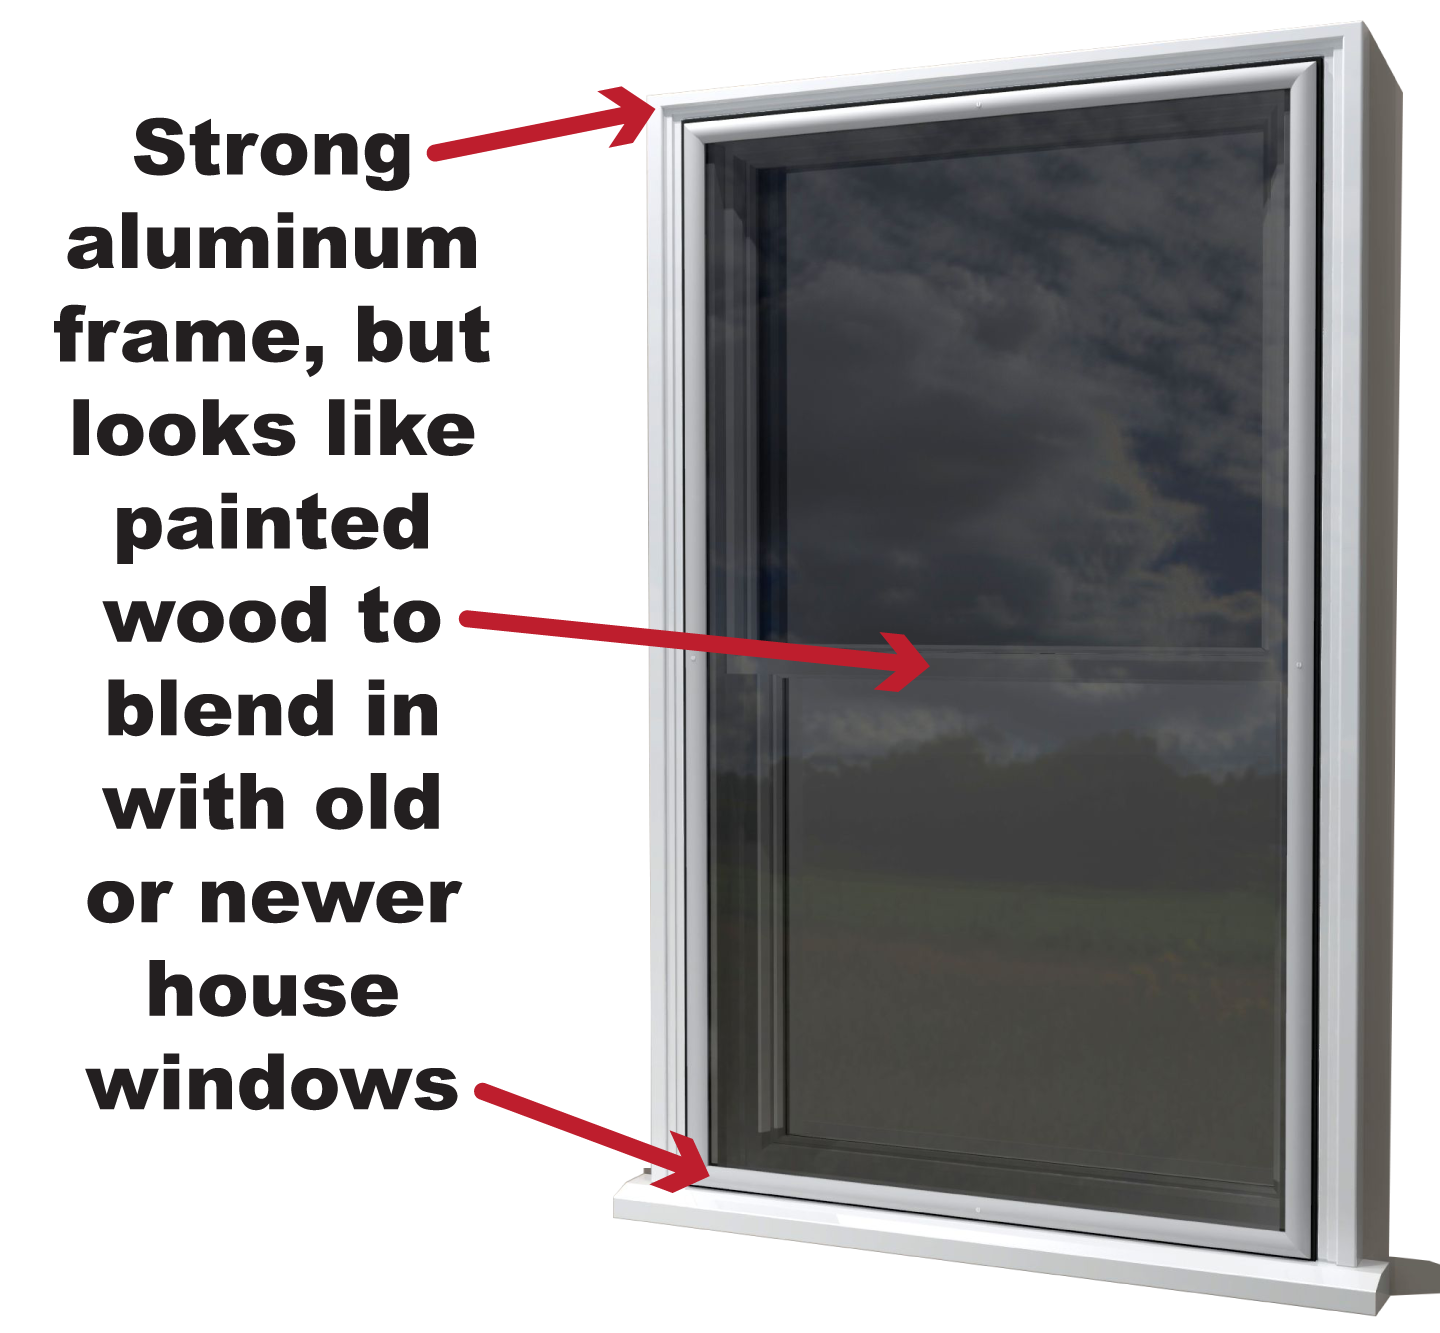
Single Piece, Tight Seal, Clear View
Storm Snaps™ are stationary 1 piece storm windows. We don’t offer a slide open option. Frame can stay in place, but lens can be easily removed when you want open air access via your window. Our one piece storm window design offers the best seal and insulation benefits and is the most attractive for your home.
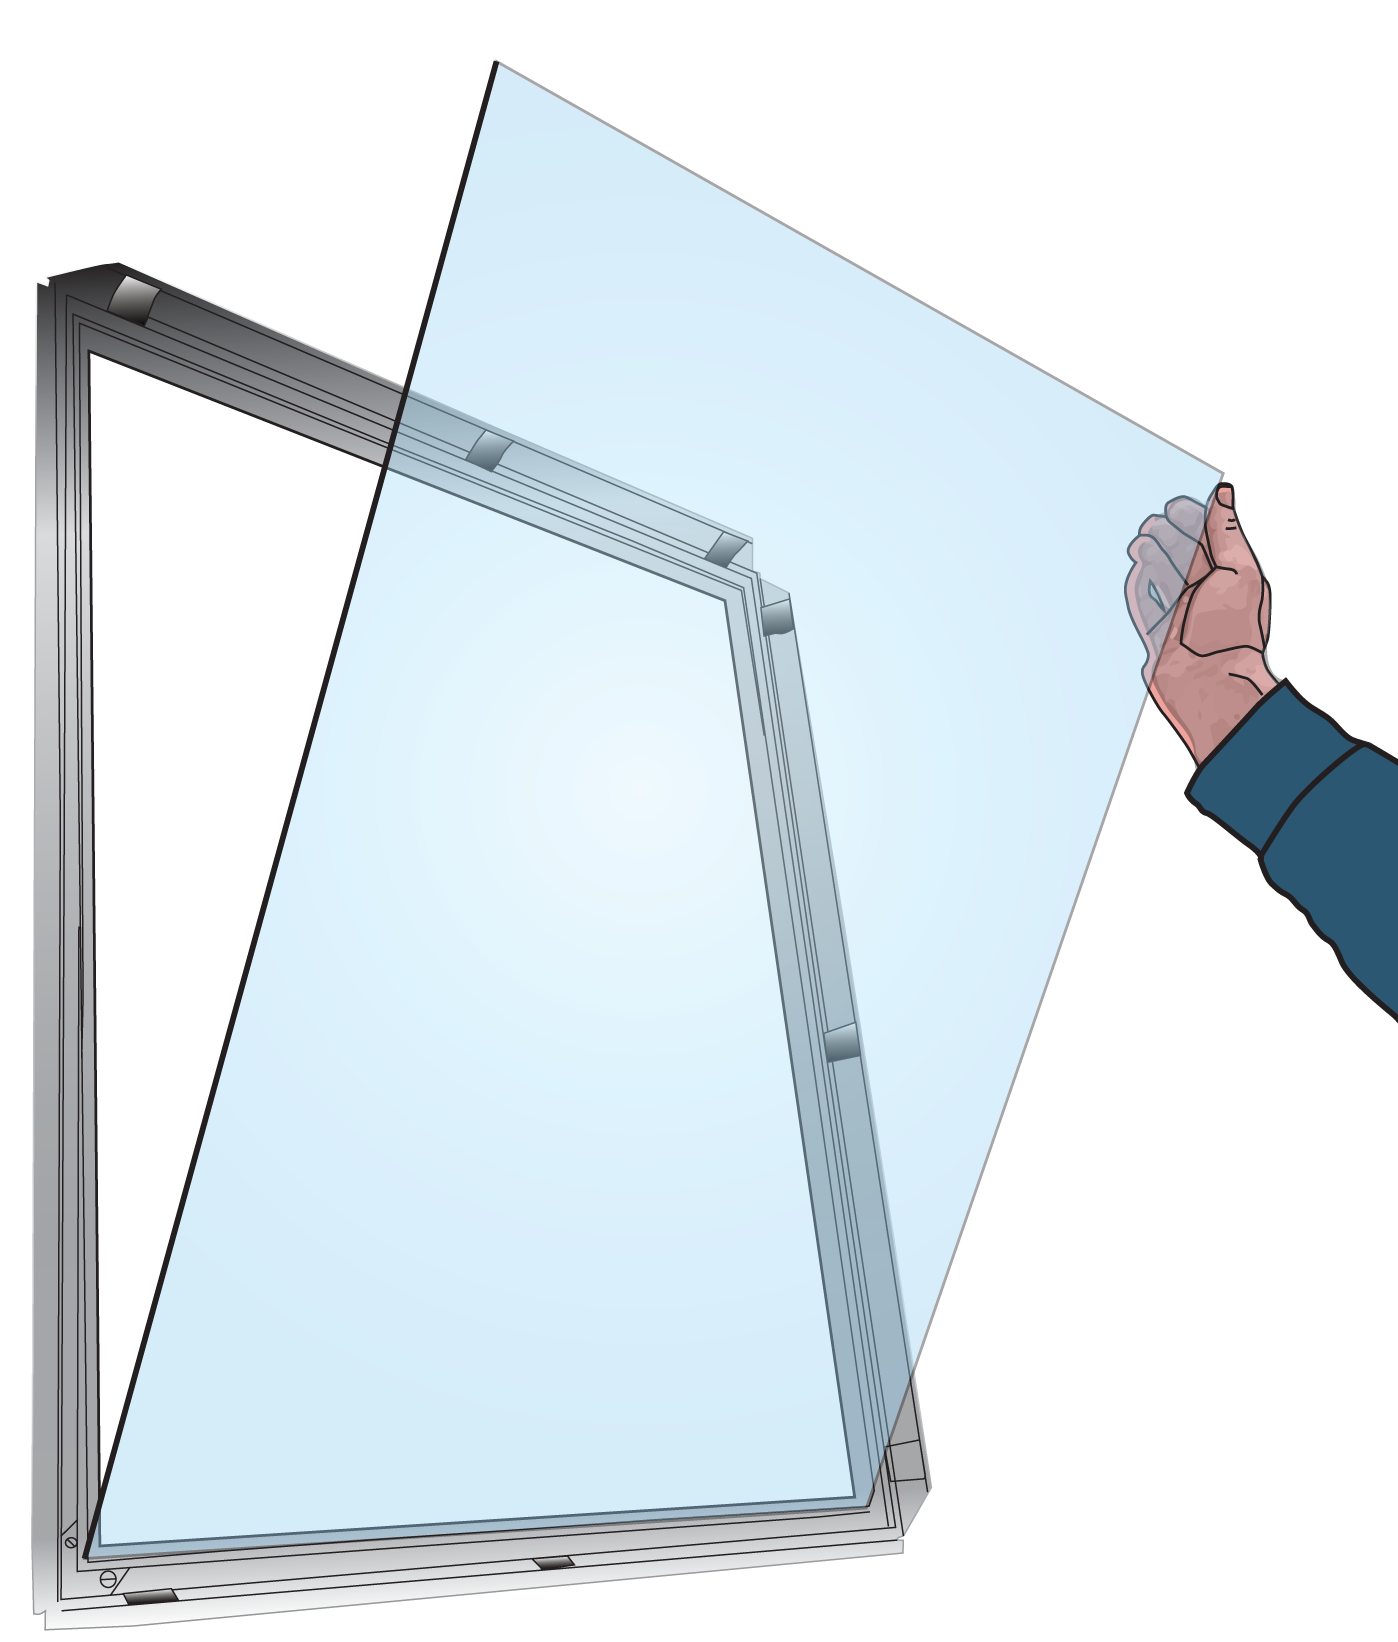
Easy Lens Replacement and Options
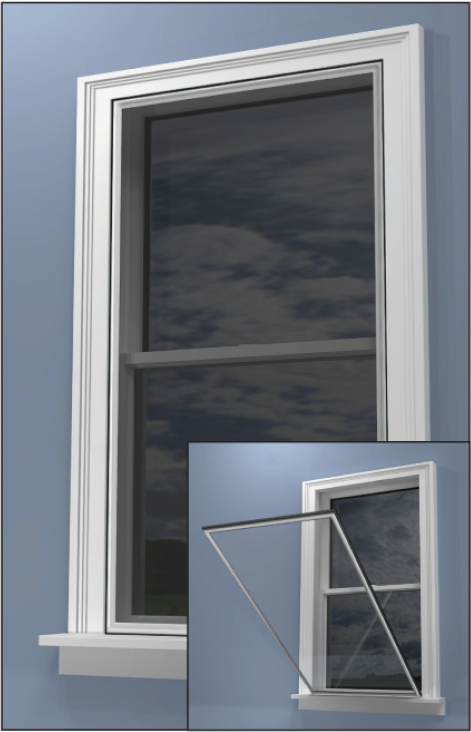
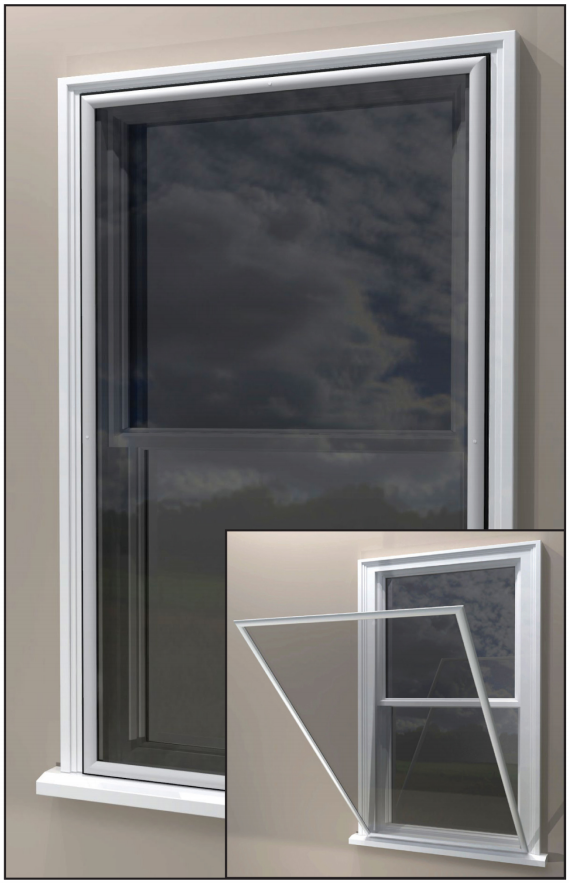
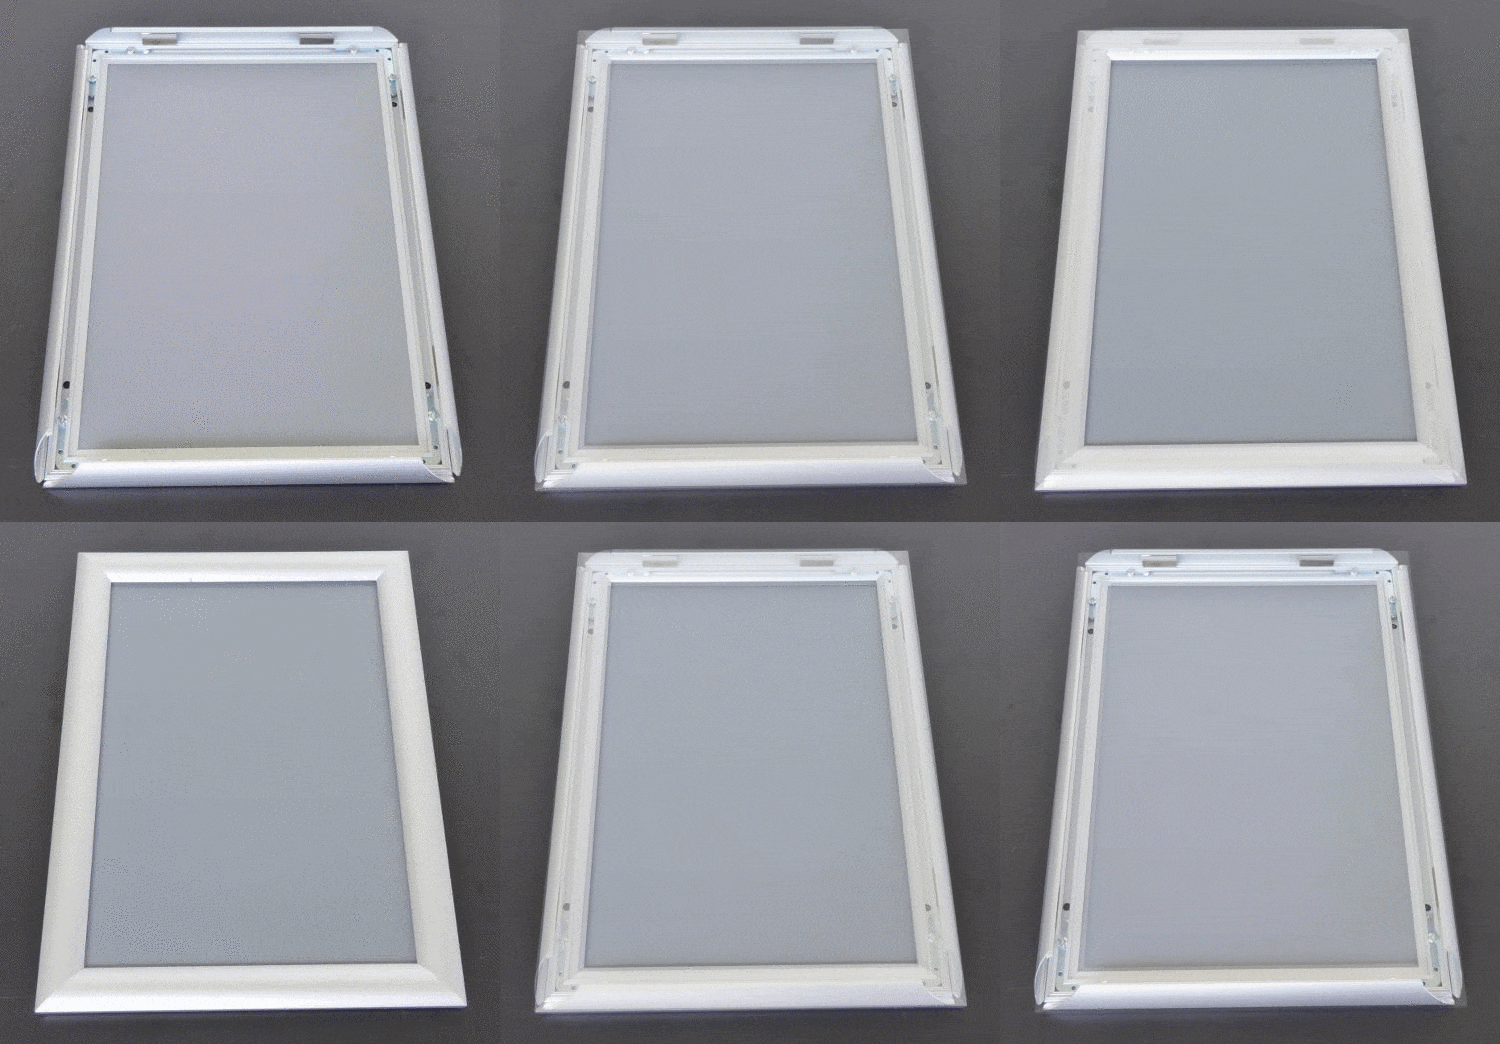
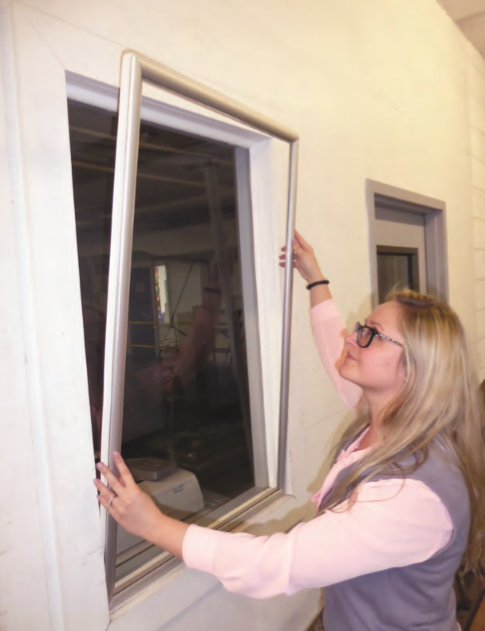
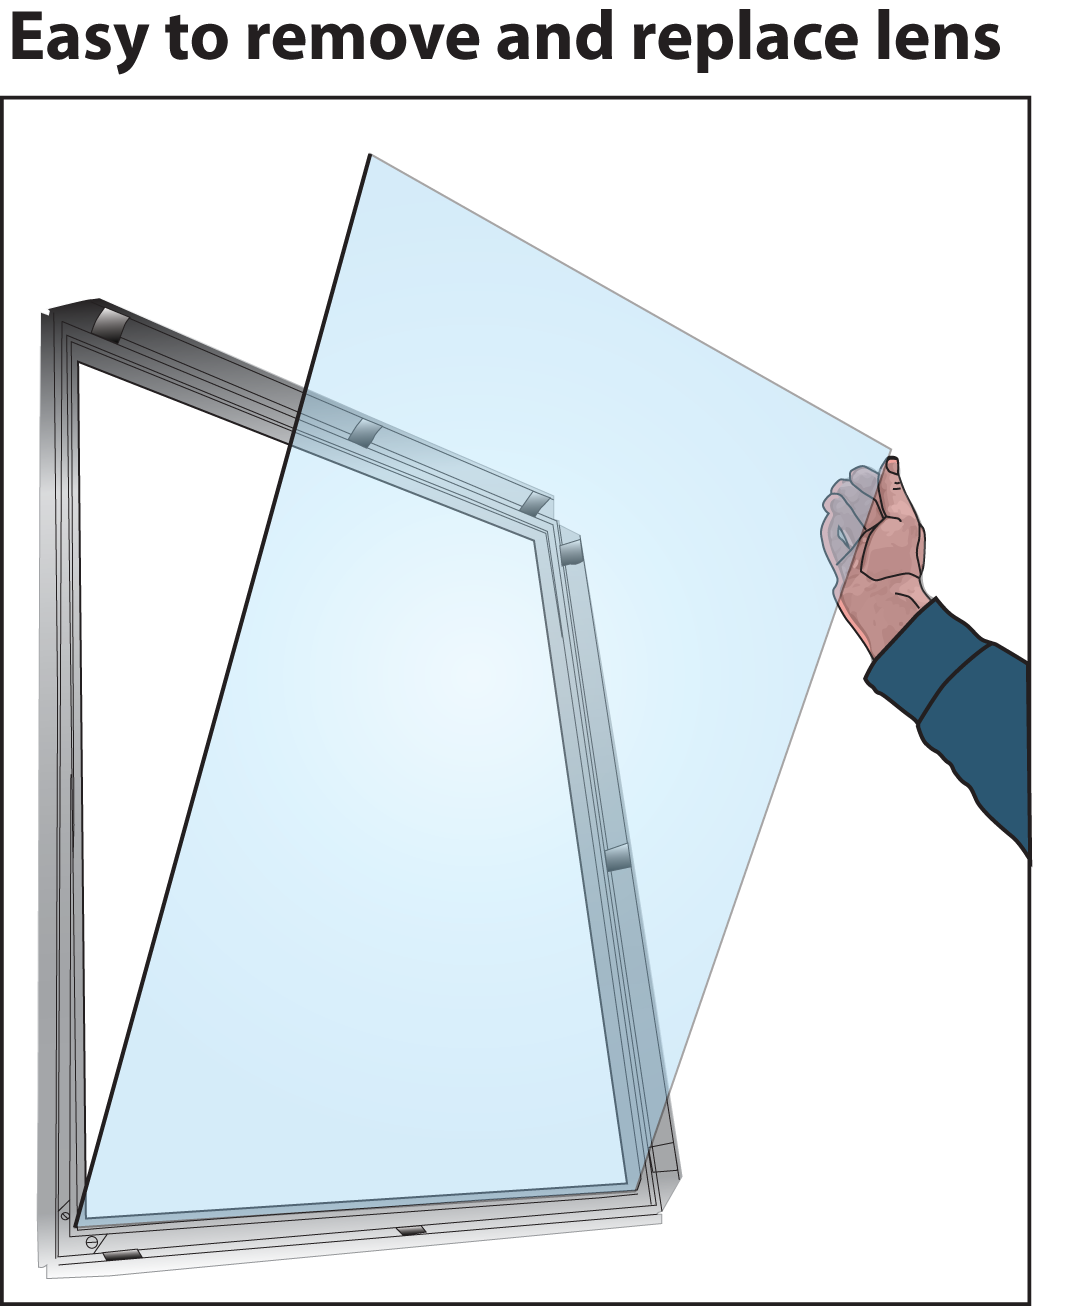
Our unique flip up and snap down frame edges allow you to easily remove, store, and install the lens as needed. The great thing is that our slim aluminum frame can stay in place, ready to have the lens easily inserted or removed any time you wish. Or leave in lens all year.
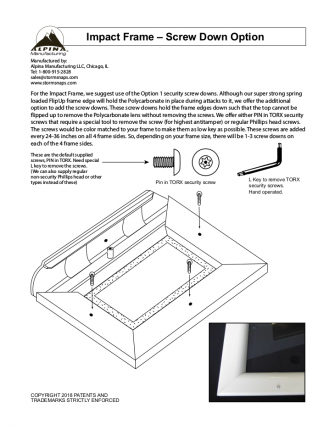
Available now, IMPACT Frames to deter vandals, burglars,
break-ins. Incredibly strong, see video below:

Deter Vandals, Burglars, and Break-ins
Our Storm Snap™ exterior storms with our nearly .220″ thick Polycarbonate lens, will protect your glass windows and deter break ins to your home or business. Super strong. Our exterior Storm Snaps with .220″ Polycarbonate have incredible strength to deter vandals, looting, break-ins.
Trim mounted installation. You need a minimum 1¾” trim width and at least .375″ clear space around all sides of the frame for tops to flip open.
Can also be ordered as a 3-sided frame so that debris is not trapped at the bottom sill area when Polycarbonate is not in place.
Email or call us for pricing or to order.
Coming Soon, Hurricane Protection
(Pending legal approval by various State agencies regulating Hurricane protection products)
Click here to get on our “notify list” when Hurricane storm windows are ready for sale
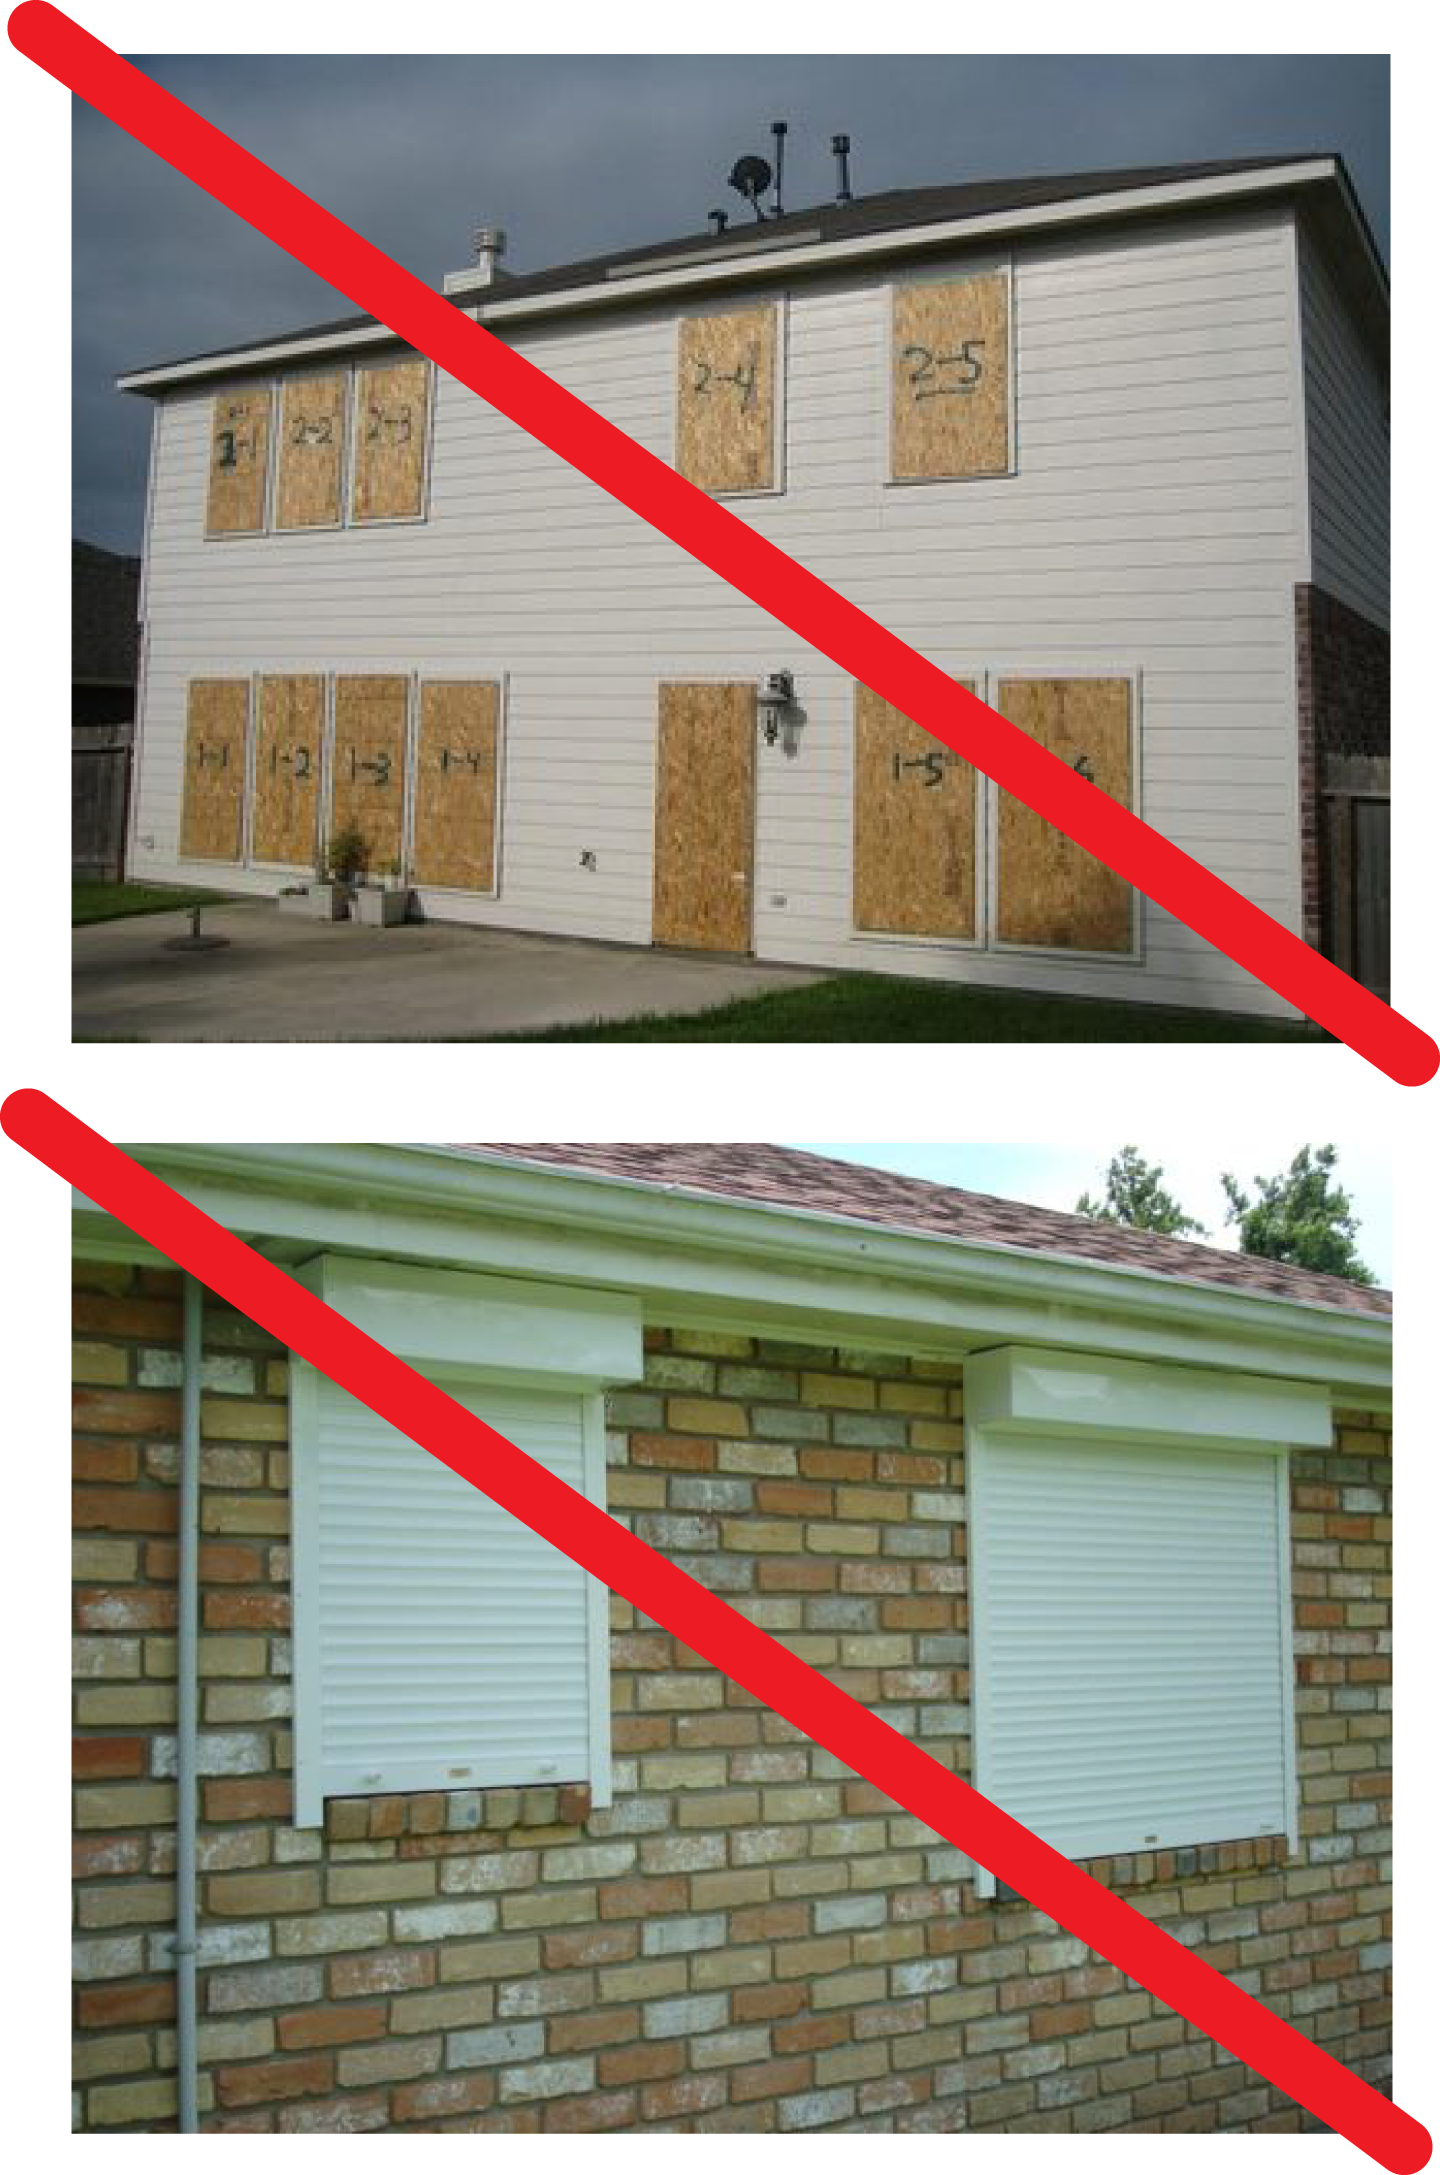
Greatly reduce the possibility of Hurricane window destruction blasts into your house
If you live in the Southern U.S. Hurricane zone , our Storm Snaps™ along with our nearly 1/4 thick Polycarbonate lens will offer incredible clear protection against flying debris breaking through your windows and blowing in water and possibly blowing off your roof. Plywood, is heavy, ugly and makes your house look abandoned and dark inside. Expensive metal rolling shutters can get bent, creating permanent damage to them, or making it unable to “roll them up” after a storm. Nylon screens and fabrics are unattractive with many visible screw heads, and your underlying windows can still get broken, due to inward flex. Storm Snaps™ for Hurricanes offer beauty and incredible strength.
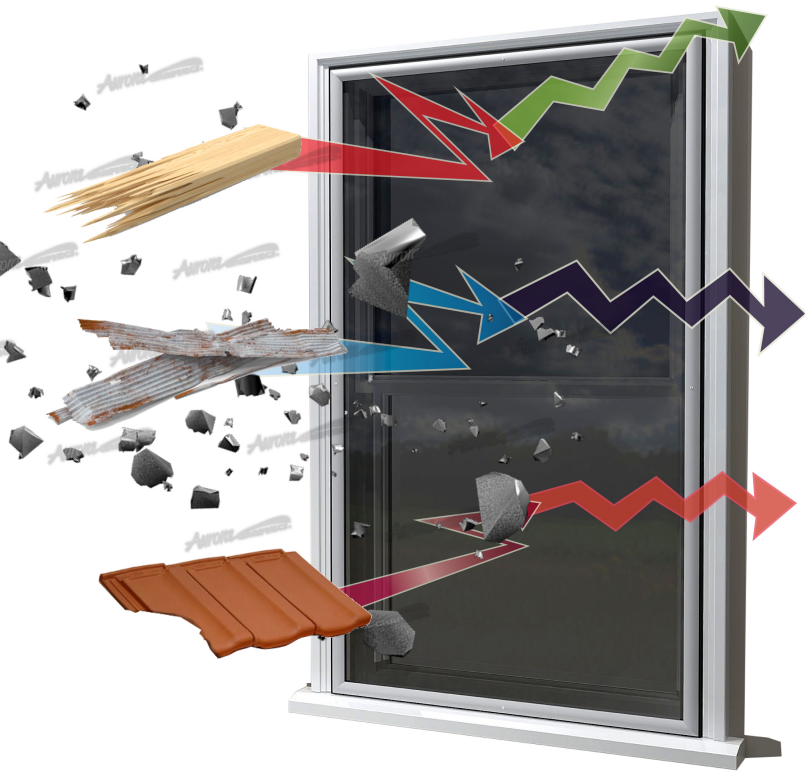
Storm Snaps™ polycarbonate lenses are incredibly strong
Our Polycarbonate lenses have super strength against Hurricane force flying objects hitting it. Our Storm Snaps™ makes your house “not look abandoned” and allows natural light into your house when the power goes out. Storm Snaps™ are a much less expensive option than rolling shutters and other un-attractive shutter type units that have large hoods sticking out and look ugly on your home. Storm Snaps™ are a powerful, low key and attractive hurricane protection alternative.
Features you’ve never seen before on a Storm Window.
Amazing patent pending design, ease of use, many benefits:
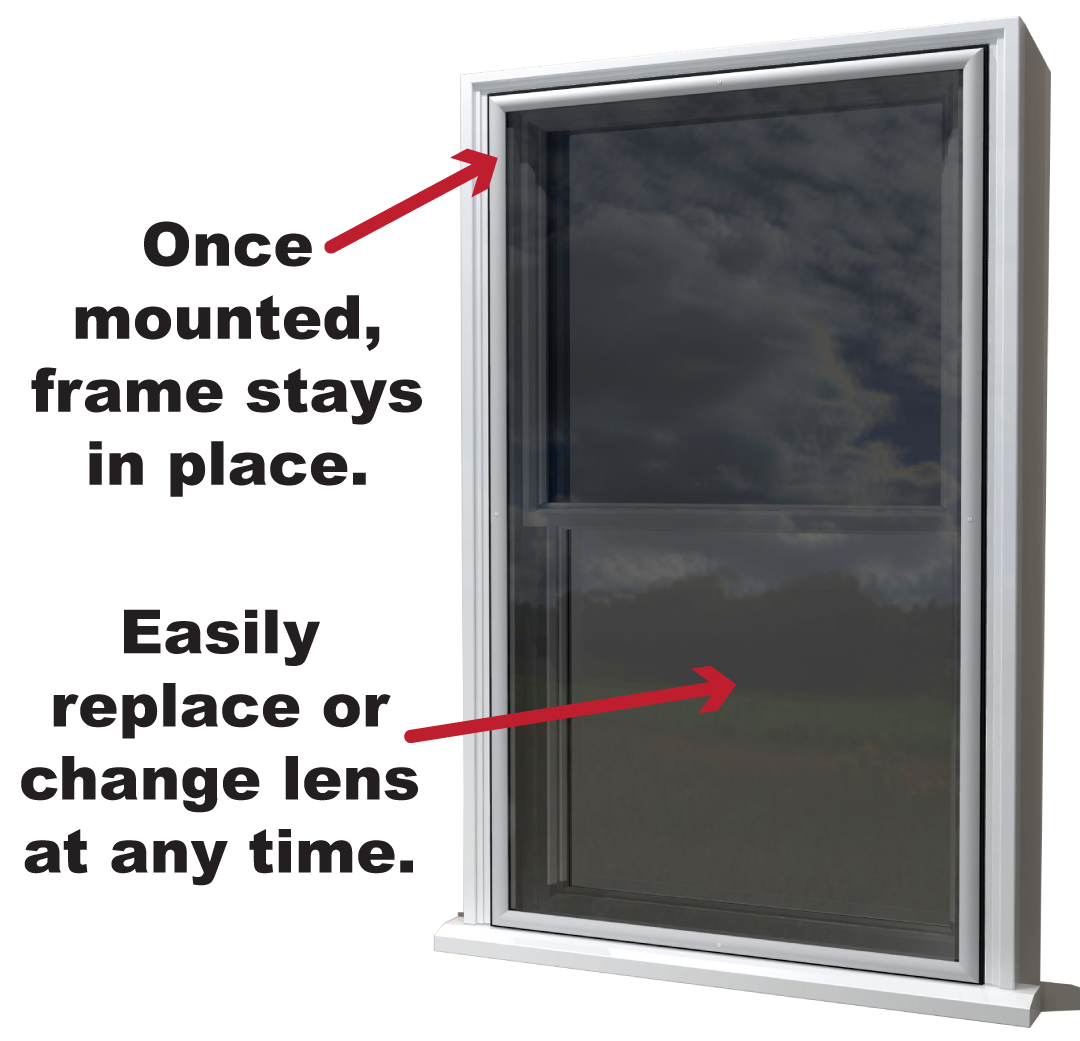
Super strong, lightweight, aluminum alloy frame design, patent pending. Others use plastics or vinyls for their frame structure. Aluminum is the most recognized and established frame material by architects and builders for many years. Strength, easy maintenance, beautiful appearance, long lasting-superior to plastic and vinyl frames.
Most frames would be sent assembled but optionally, large frames can be sent un-assembled for much lower cost shipping. You buy lenses locally from your hardware store, or we can ship the lenses separately.
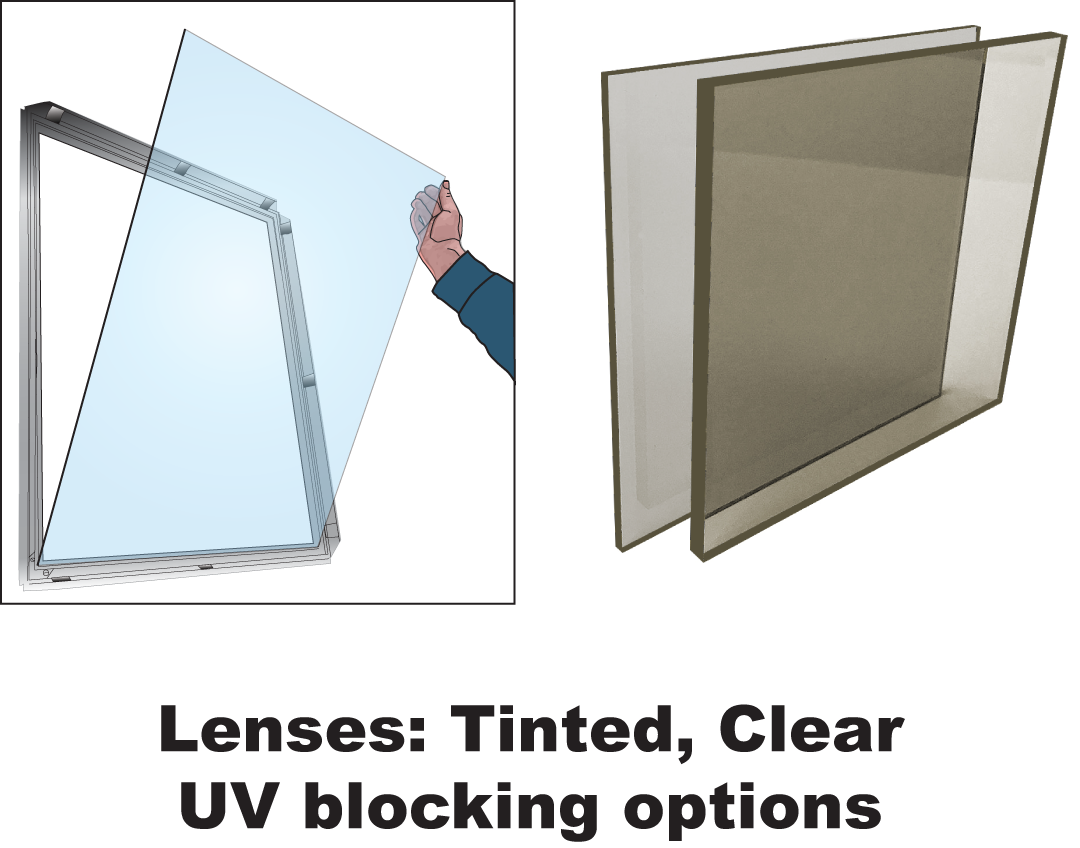
One frame, multiple lens options that can be changed at any time.
Edges of frame flip up on all 4 sides to allow easy install and removal of lens for storage, cleaning or replacement of lens.
Emergency window escape: Simply open up any of the 4 sides and remove the lens or pull out the interior frame by force. For exterior, push or kick out lens at either bottom corner.
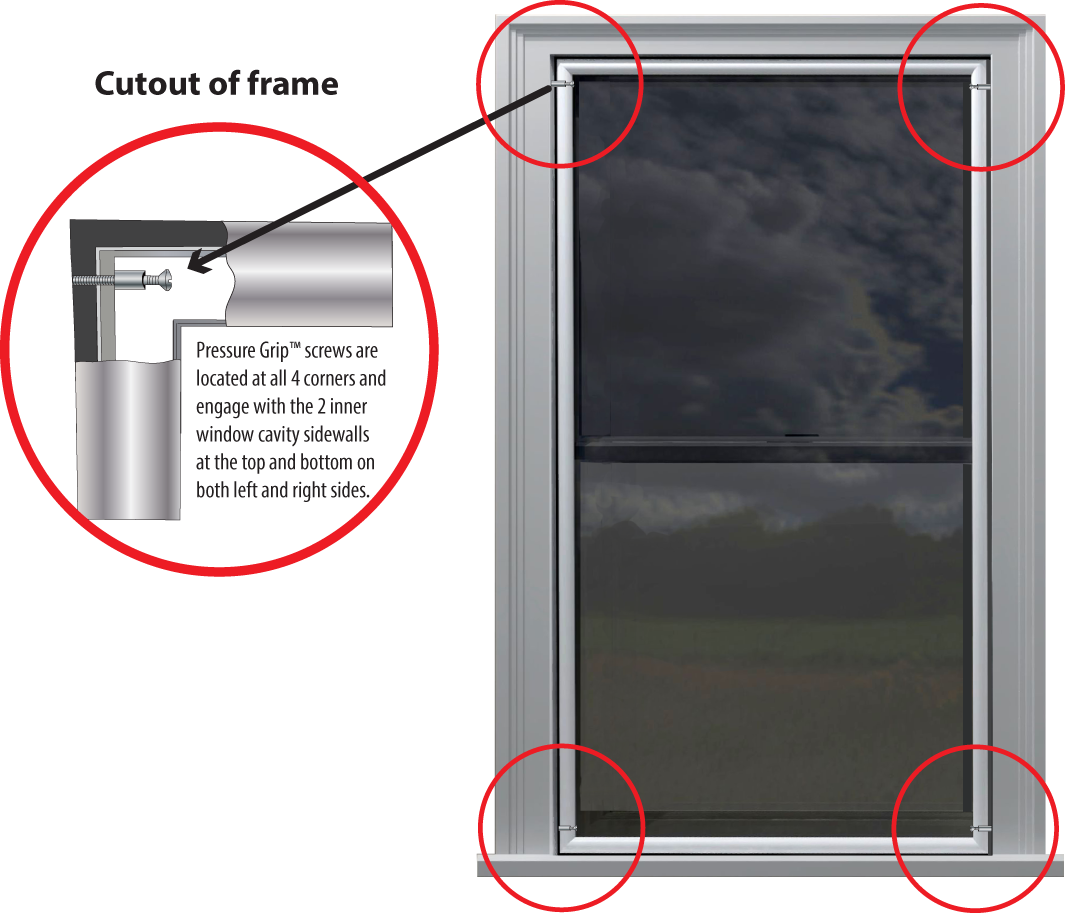
Lightweight, easy to handle frame, without the lens, is first installed on your window interior, exterior or both. Then Pressure Grip™ screws are tightened to hold the frame in place. Finally, the lens is easily inserted.
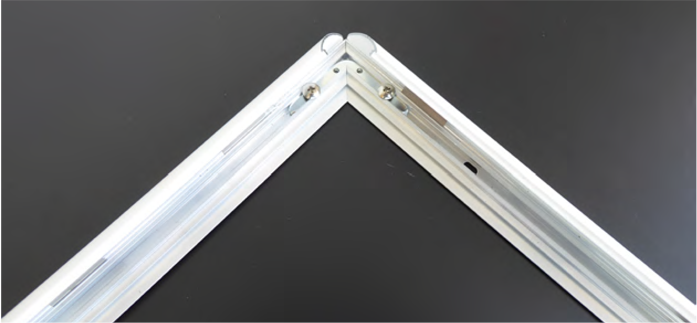
To keep your Storm Snap™ nicely in place, and avoid your Storm Snap™ falling out, tighten the 4 Pressure Grip™ screws. These side screws grip your frame onto your window cavity. Using a Phillips head screw driver, lightly tighten the pressure grip screws on all 4 corners of your frame BEFORE installing your lens. These screws hold your Storm Snap™ in place by pressure and don’t require holes in your window frame cavity.
During higher wind events, leaky outside exterior windows can build up air pressure in the window cavity and exert pressure on your interior Storm Snap™, trying to push it in. Proper tightening of the 4 side Pressure Grip™ screws will prevent this (Patent Pending).
Why our Storm Snap™ frames are superior
to other interior or exterior frames:
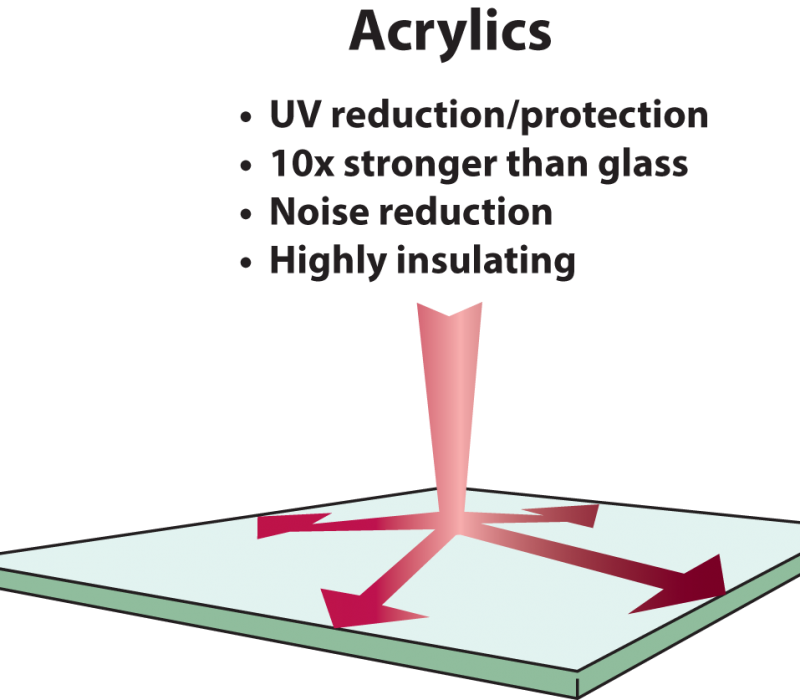
Our frames use optical grade acrylics and polycarbonates, not soft, easily punctured, lower grade vinyl. The only negative is that acrylic can scratch, but are usually minor scratches that are barely visible, and most scratches can be polished out. See “Cleaning Lenses” in the left menu. Our lens options offer clarity and transparency as good as glass, and super strong against breakage too! Plus, our lenses are superior to glass for insulation value and noise reduction!
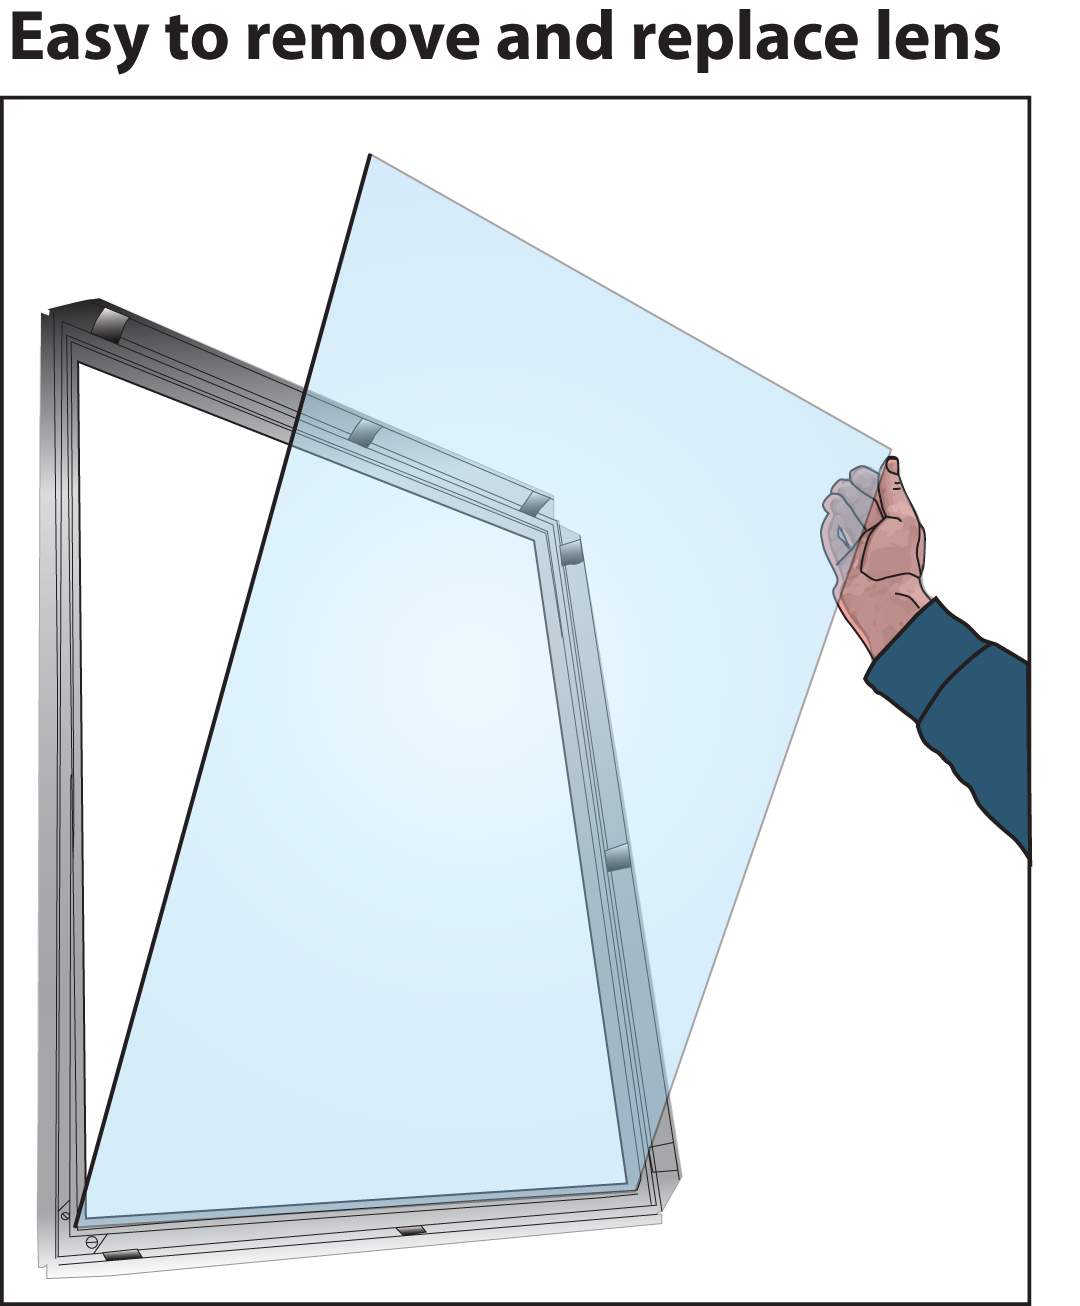
If you scratch or damage other storm window lenses, you have to replace their entire frame at high expense. Our lens can be replaced easily at any time without having to buy a new frame. Only Storm Snaps™ offer the ability to insert regular clear lens or tinted/ reflective lens to block damaging summer heat. Save on utility costs and avoid carpet and furniture fading in your house. We also offer a tight weave bug screen insert for your Storm Snap™ frames.
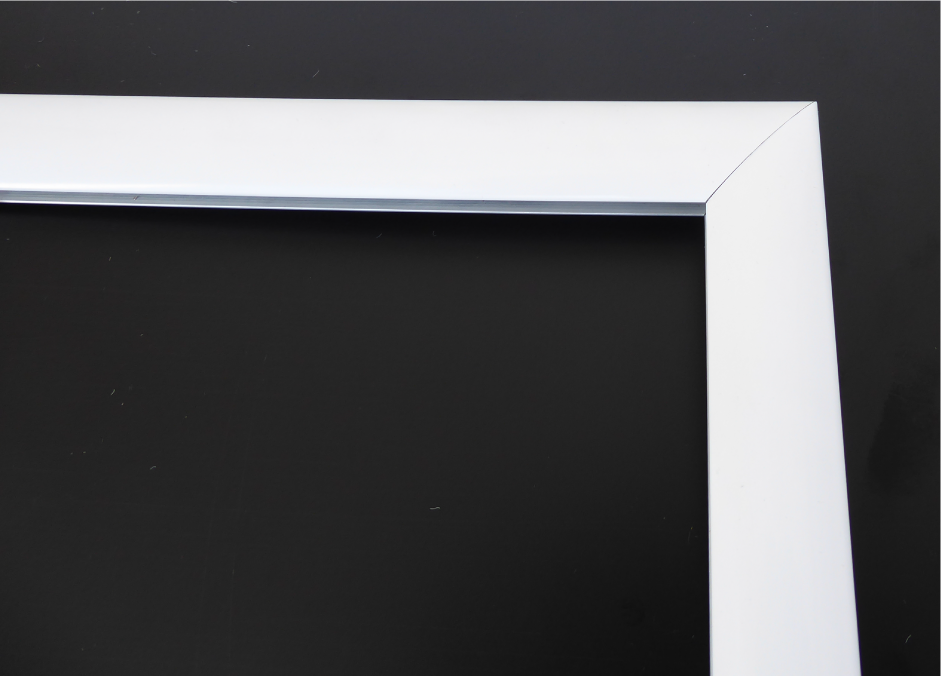
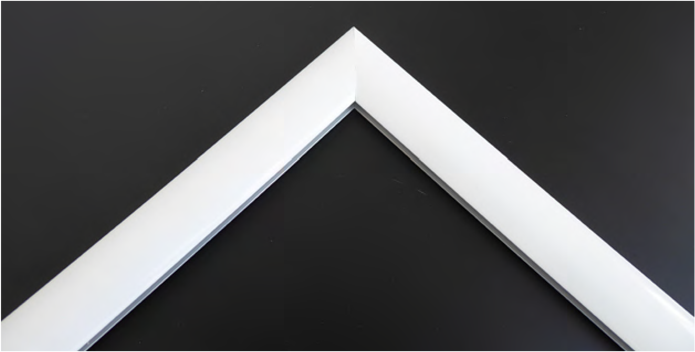
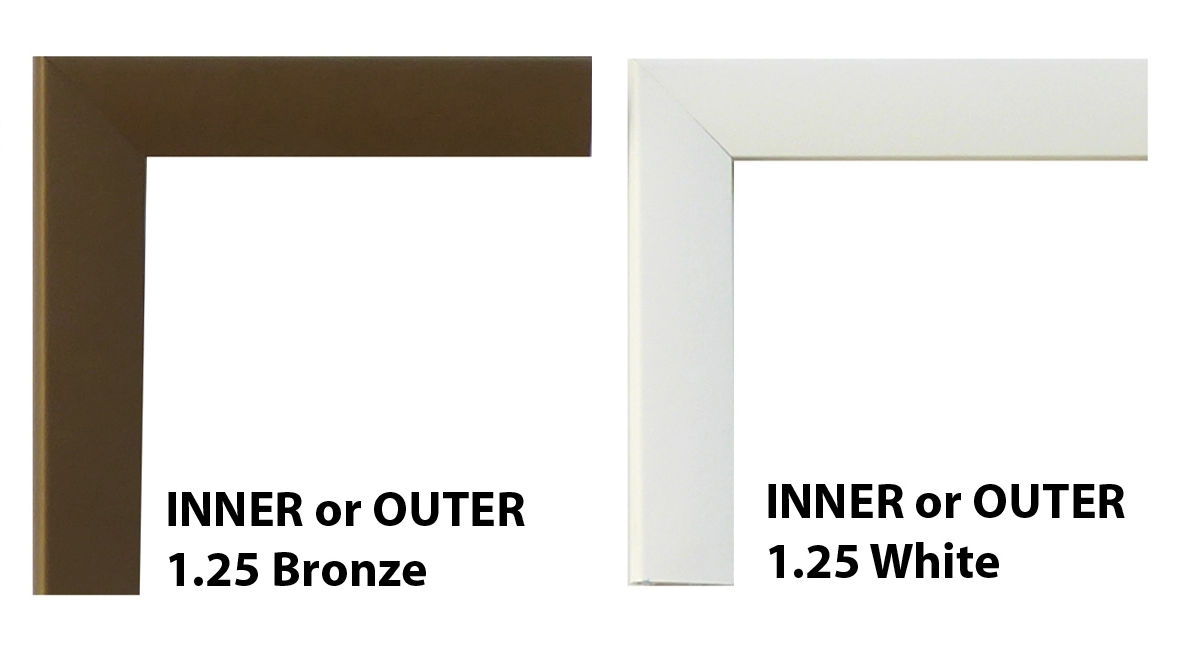
Attractive, professional miter cut frame corners provide the best appearance. Our frames are sturdy, attractive high grade alloy aluminum, the number #1 choice material of major window manufacturers. They are specially made to blend in beautifully with your older wood windows too, by looking like painted wood frames.

Easiest to install and align interior press fit frames!
The problem with other press fit frames is that they’re difficult to install nicely in your window cavity. It gets pushed in too deep, or too far pushed in on one corner. Once it’s pushed in, it’s hard to pull out and straighten. It’s really challenging to get it “just right” inside your window cavity, without it looking crooked.
Our frame is super easy to install and align in your window frame. Our Storm Snaps™ are first installed “without” the lens. So, it’s very easy to push in and pull out a bit to get it square and aligned nicely in your window cavity. Because the lens is not yet installed, it’s easy to push from the front and pull out from the back of the frame and align it. Then, our patent pending Pressure Grip™ screws hold your frame in place to avoid “blow-ins.”Then, you simply install your lens and snap down all 4 frame edges. You’re set!
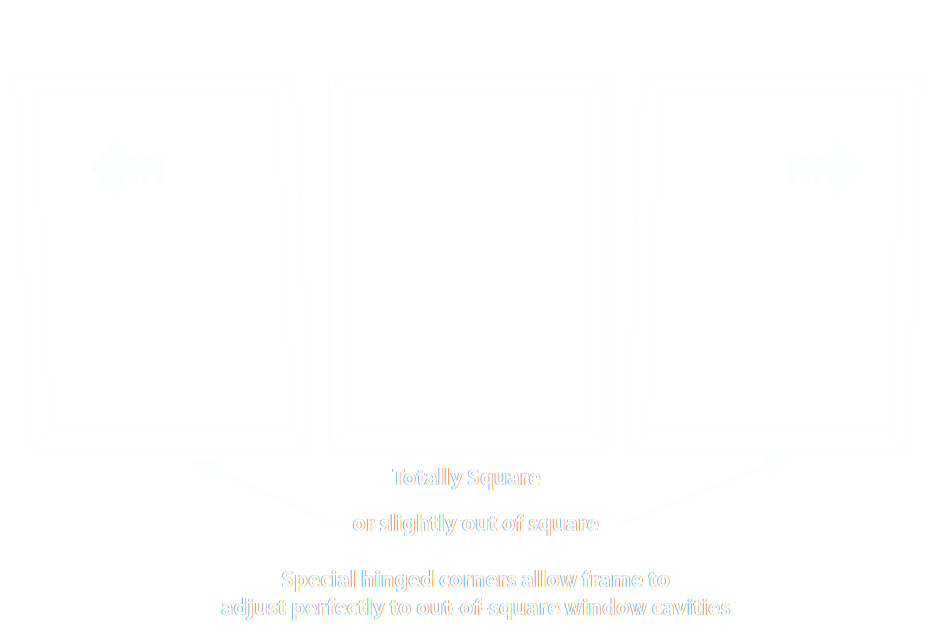
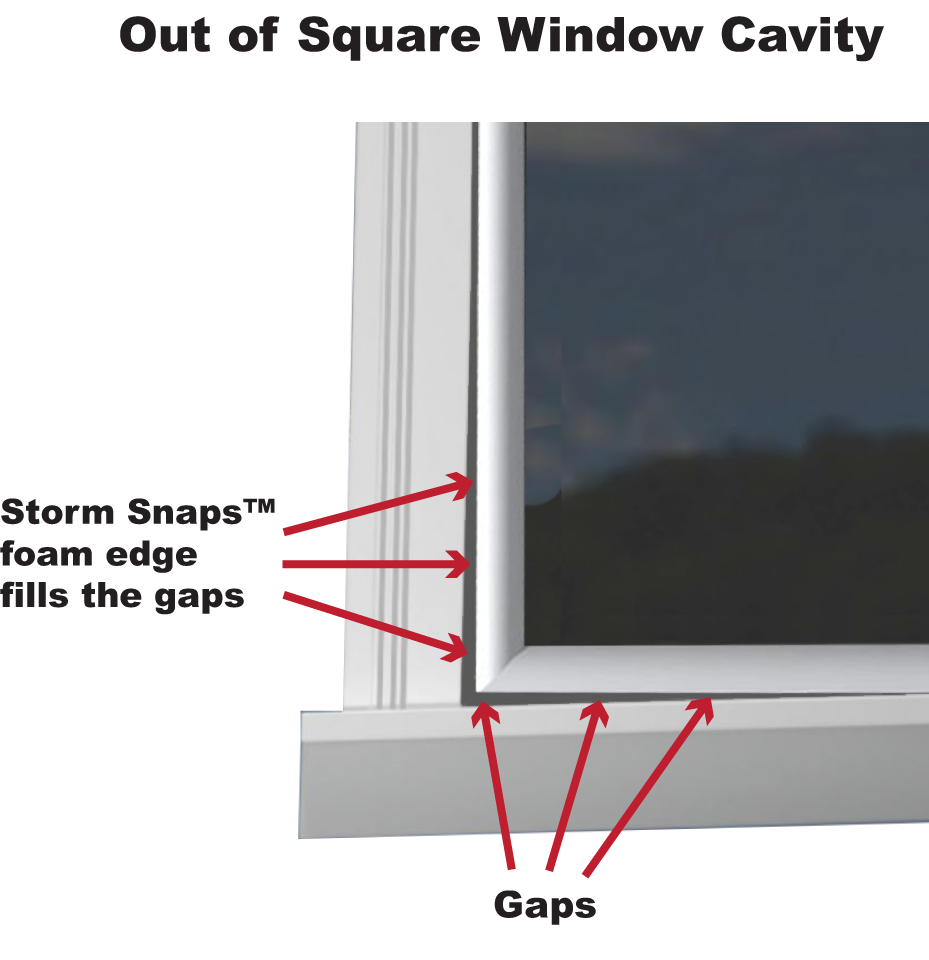
Our patent-pending articulating corner frame easily adapts to the shape of your window cavity. 97% of windows are out of square to some degree, and Storm Snaps™ frames will fit your cavity perfectly. Our high-grade compressible EPDM industrial rubber edge will seal around all 4 sides. The closed cells trap air, cold and sound waves. Avoid the cheap grey open cell foam of other frames. Compare the superior design and features of our patent-pending frame to Innerglass and Indow frames that cost 3-5x more.
About us

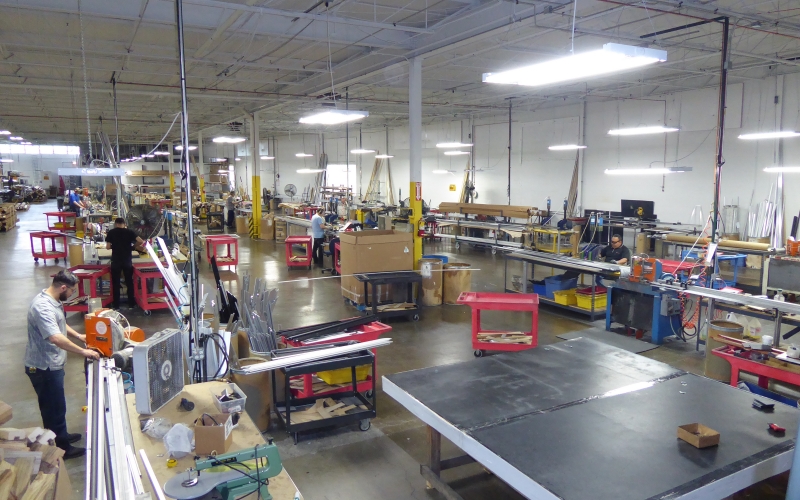
We are experts in making frames. In the frame industry, we have made over 6 million frames for graphic display and tough environment public transit stations. So, we know how to make durable, tough, attractive frames. In 2017, we developed a “storm window” division to use our expertise to develop storm window frames using our state of the art equipment and have created the most amazing, highly effective, easy to use, homeowner friendly storm window frames you can find.

Above is a beautiful Chicago skyline, night photo, taken from the John Hancock building. This frame is made by our Graphics Frame division of Alpina and is 54” x 109”, edge lit LED, less than 1” thick.
Why Chicago made ? We are a city built on manufacturing and centrally located in the U.S. for the lowest cost shipping to the east and west coasts. We have always been America’s great manufacturing city and still are. Chicago’s a tough, fast paced city and we thrive on hard work and making great products. We have grateful, hard working, caring employees that want you to make the best products at the lowest prices. Our smart sales staff answer our phones and emails for questions and placing orders. We keep valuable jobs in America.
Order process
We make and ship your frames along with the lens of your choice. We will make sure you measured correctly before we make your frames. It’s important all measurements are correctly done by you. We don’t want to be difficult, but we want to make sure you get the correct measurements. It’s not hard, you just have to follow our simple instructions.
Measuring for Interior mount “INNER” style frames
Before ordering *Inside mount Storm Snaps™,
Please check items 1. & 2. before entering your measurements.
3. Measuring your window cavity
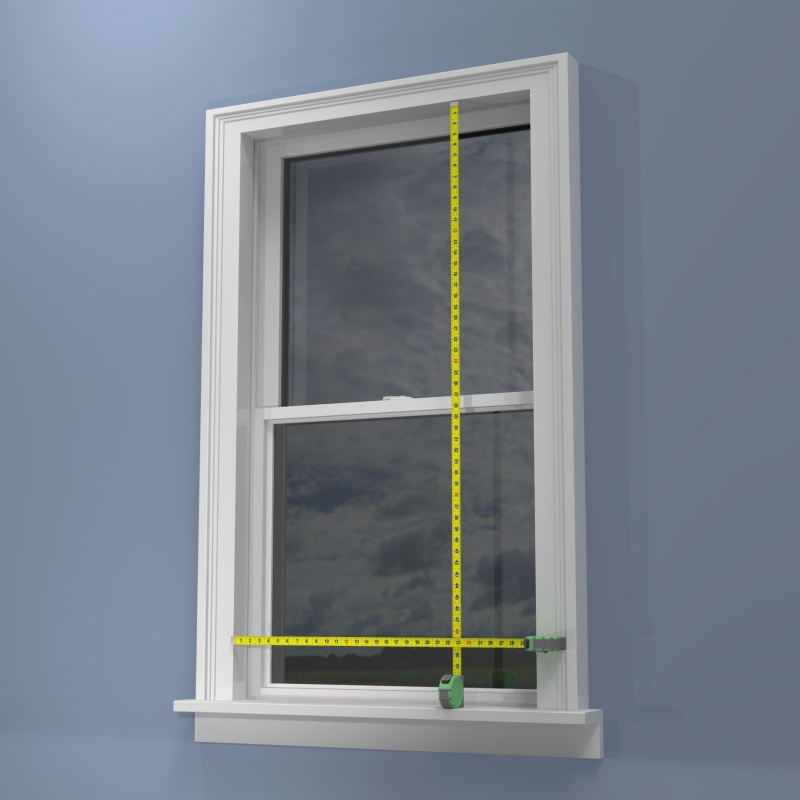
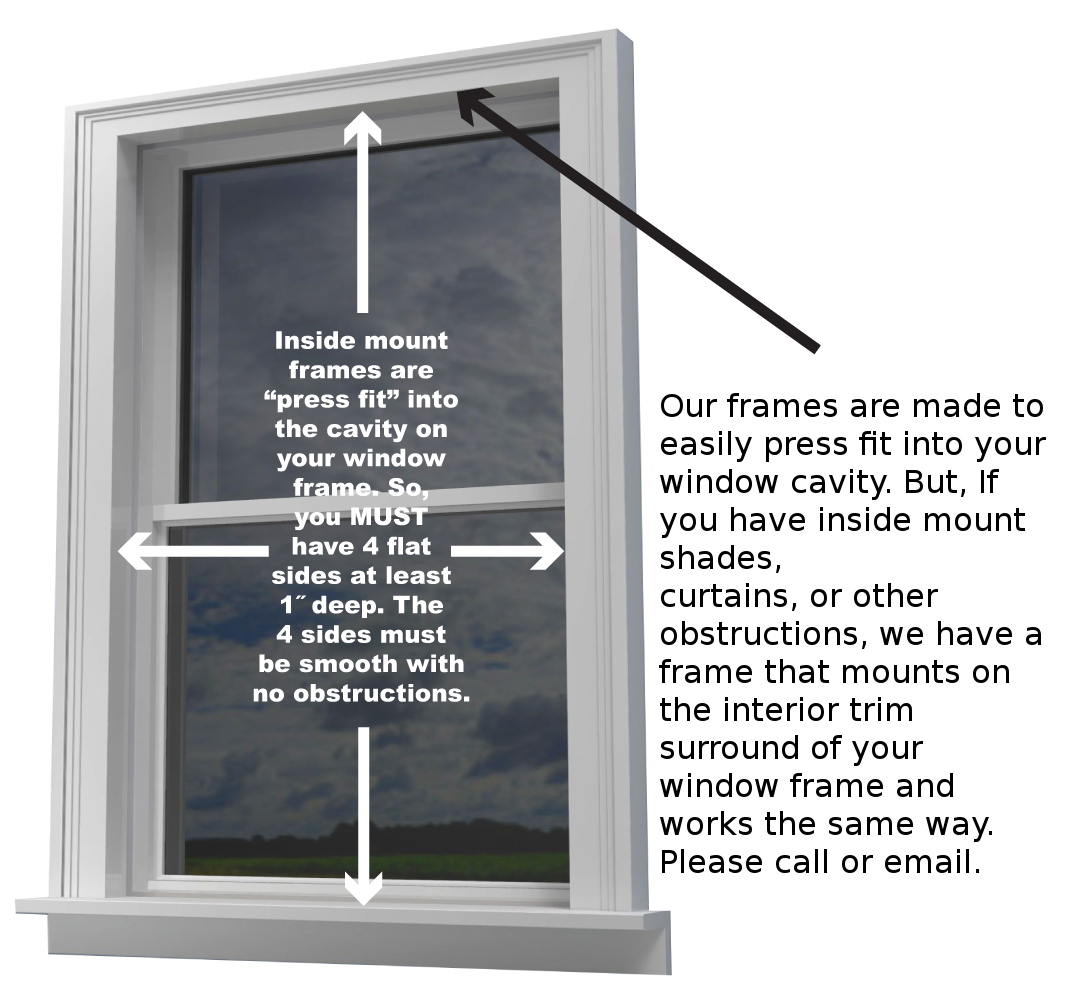
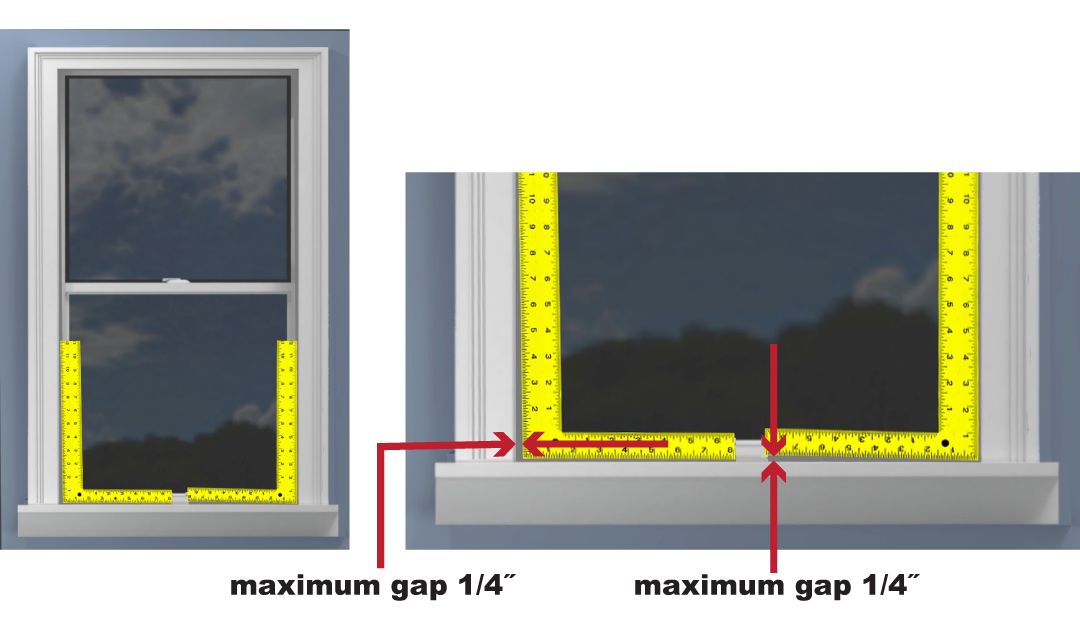
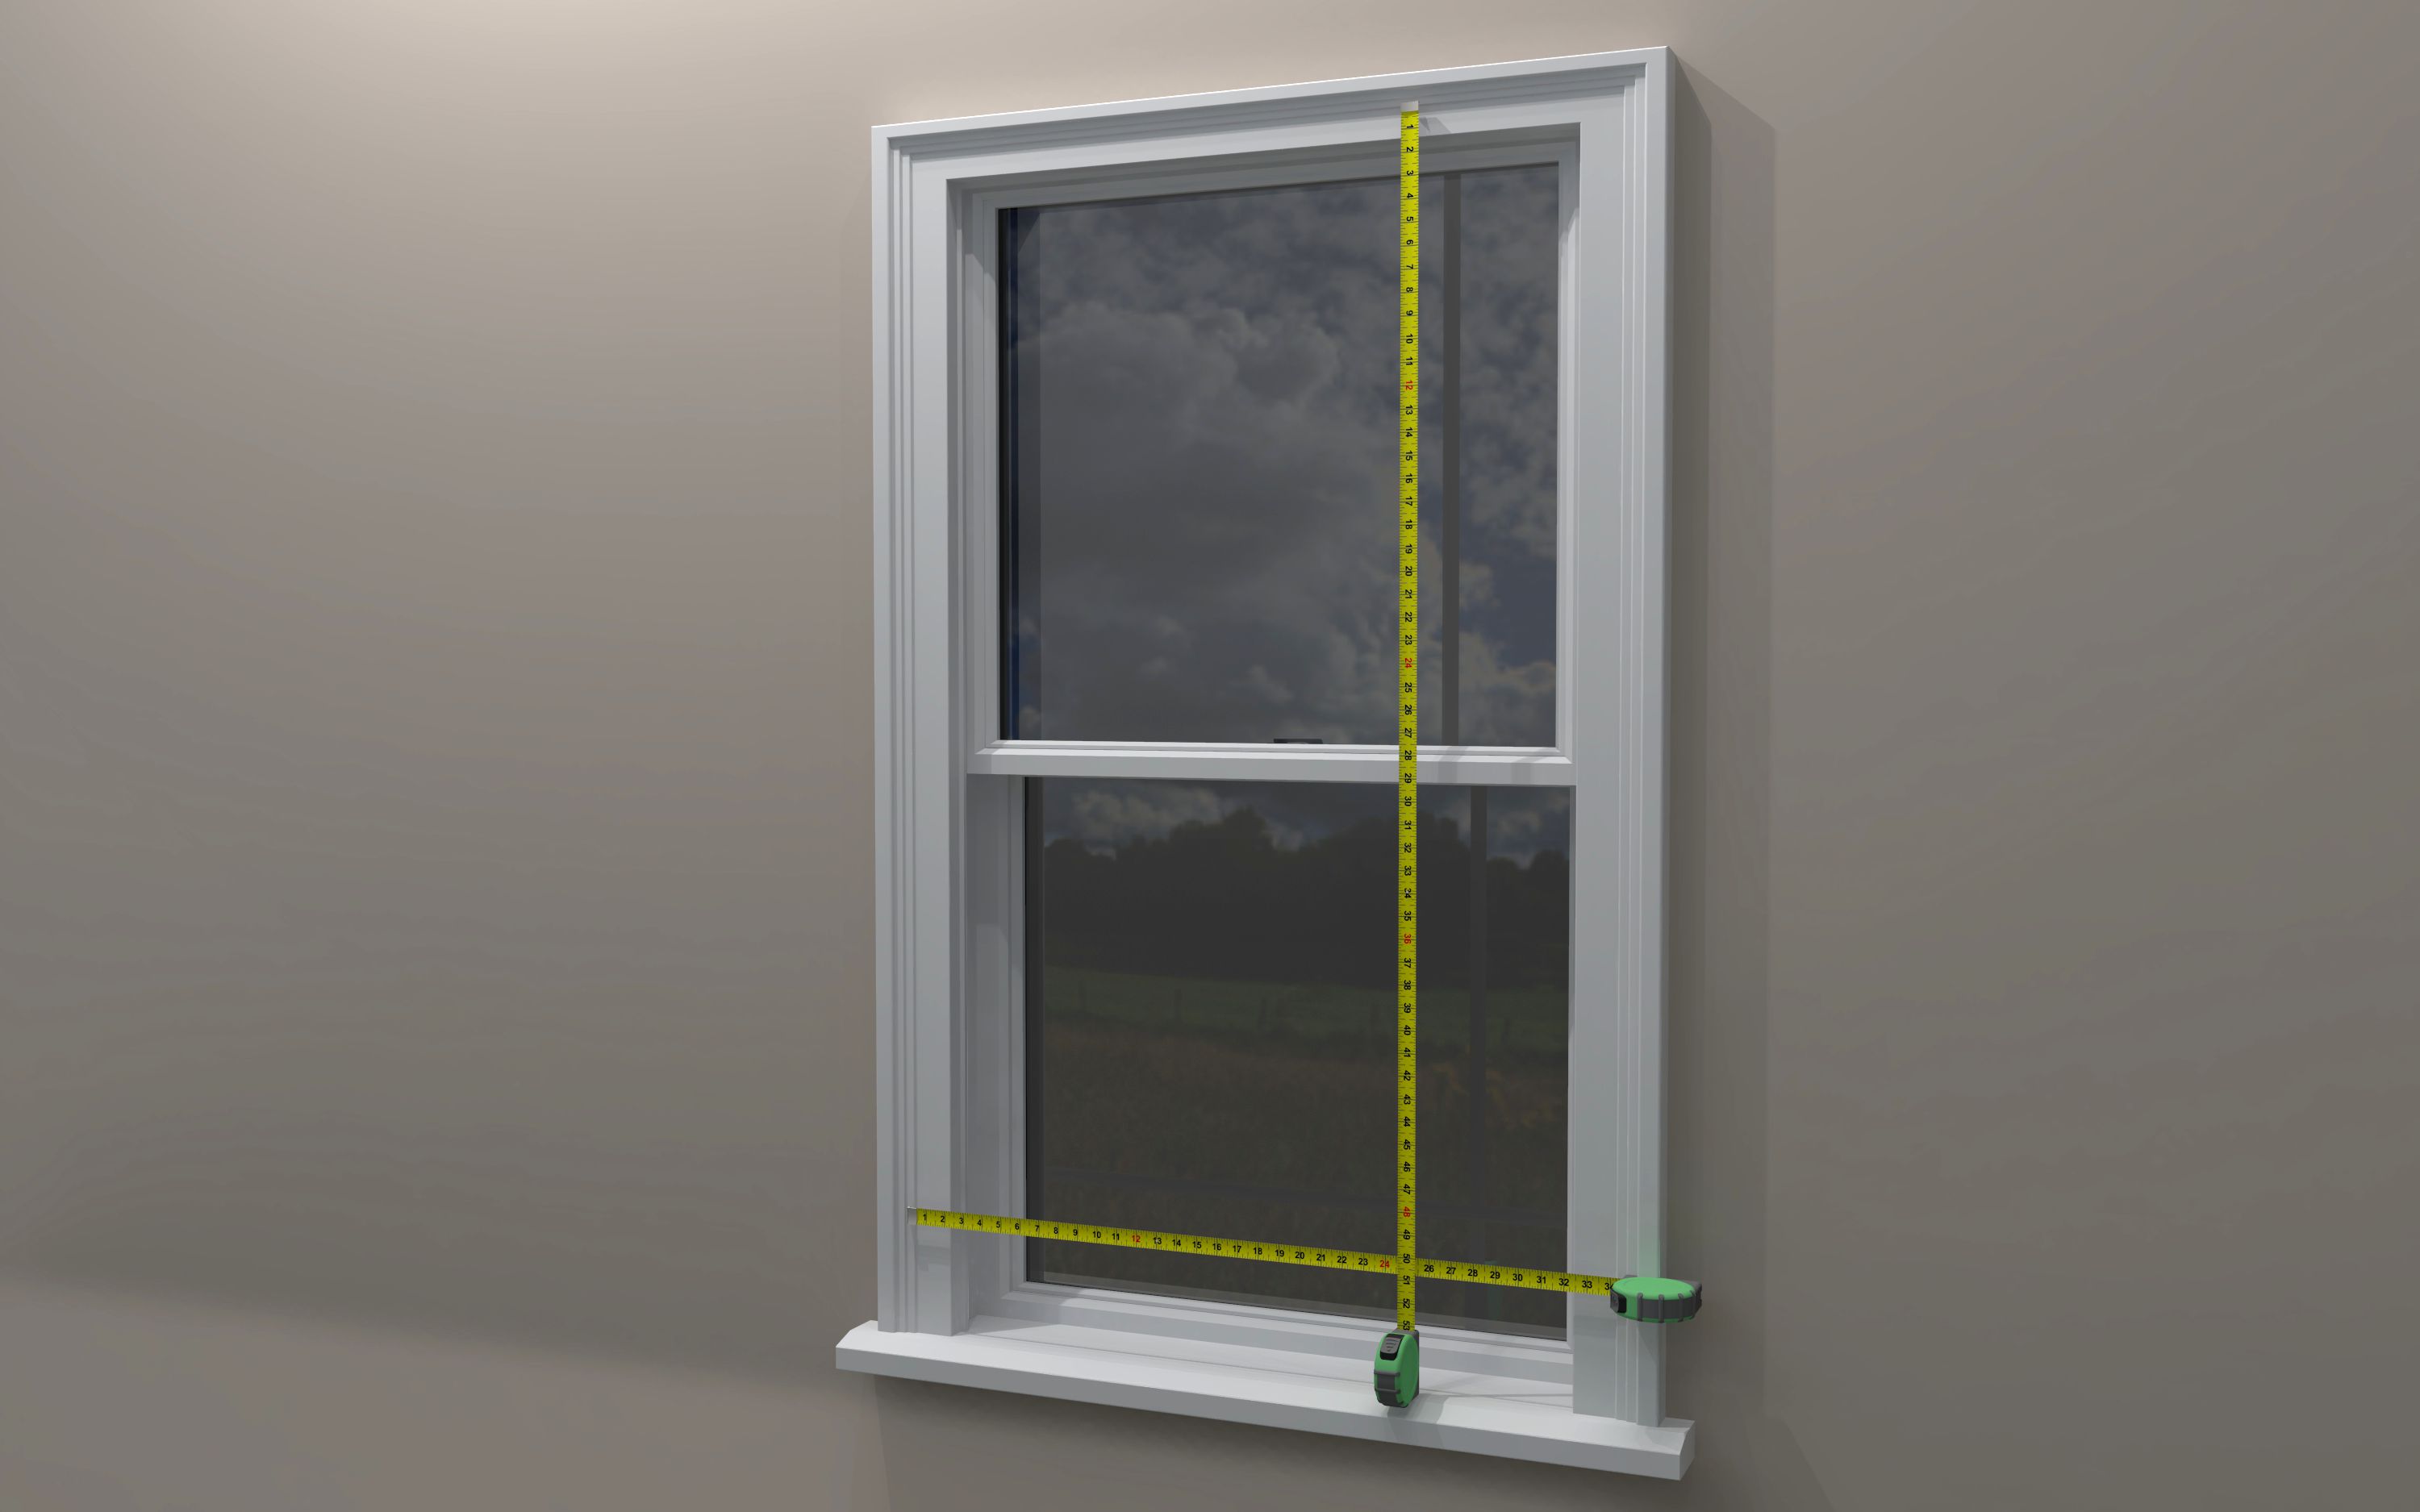
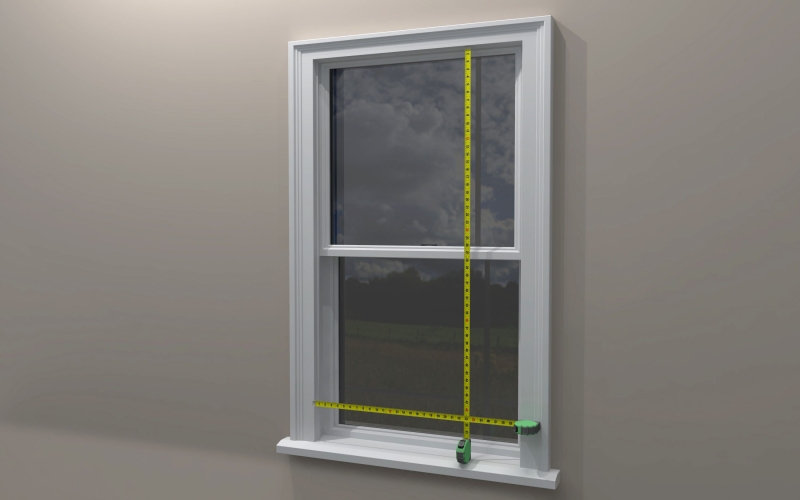
Measure the inside Cavity where your INNER press fit frames will fit into. Make sure there are no obstructions on the top, left or right sides of the cavity, and that the cavity is a minimum 3/4″ deep all around. Measure top, middle, and bottom for width and height. Round down to nearest 1/16″. Measure carefully!
Interior Press Fit Storm Snaps™ Installation
INNER1.25 frame
Step 1
Carefully unpack your frames. Your lens has protective sheeting on both sides, don’t remove it until lens is ready to install.
Make sure you have the correct size Storm Snap™ and lens for your window.
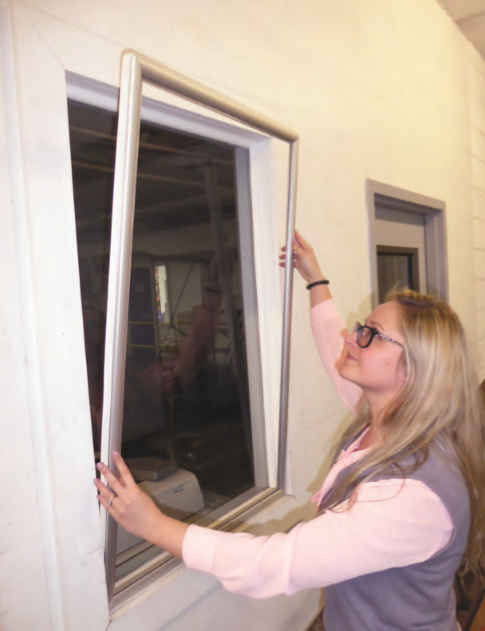
Step 1 Without lens installed, angle frame into the top of your window cavity and gently push up and press your Storm Snap™ into your window cavity. Don’t push in deep, keep as much of an “air” gap as possible between your exterior window for best insulation. Easily adjust your Storm Snap™ in your window cavity by reaching around the back of the Storm Snap™ frame and pulling out to align nicely.
Align Storm Snap™ in your window cavity and then go to step 2.

Step 2
The problem with other press fit frames is that they’re difficult to install nicely in your window cavity. It gets pushed in too deep, or too far pushed in on one corner. Once it’s pushed in, it’s hard to pull out and straighten. It’s really challenging to get it “just right” inside your window cavity, without it looking crooked.
Our frame is super easy to install and align in your window frame. Our Storm Snaps™ are first installed “without” the lens. So, it’s very easy to push in and pull out a bit to get it square and aligned nicely in your window cavity. Because the lens is not yet installed, it’s easy to push from the front and pull out from the back of the frame and align it. Then, our patent pending Pressure Grip™ screws hold your frame in place to avoid “blow-ins.”Then, you simply install your lens and snap down all 4 frame edges. You’re set!
Step 3
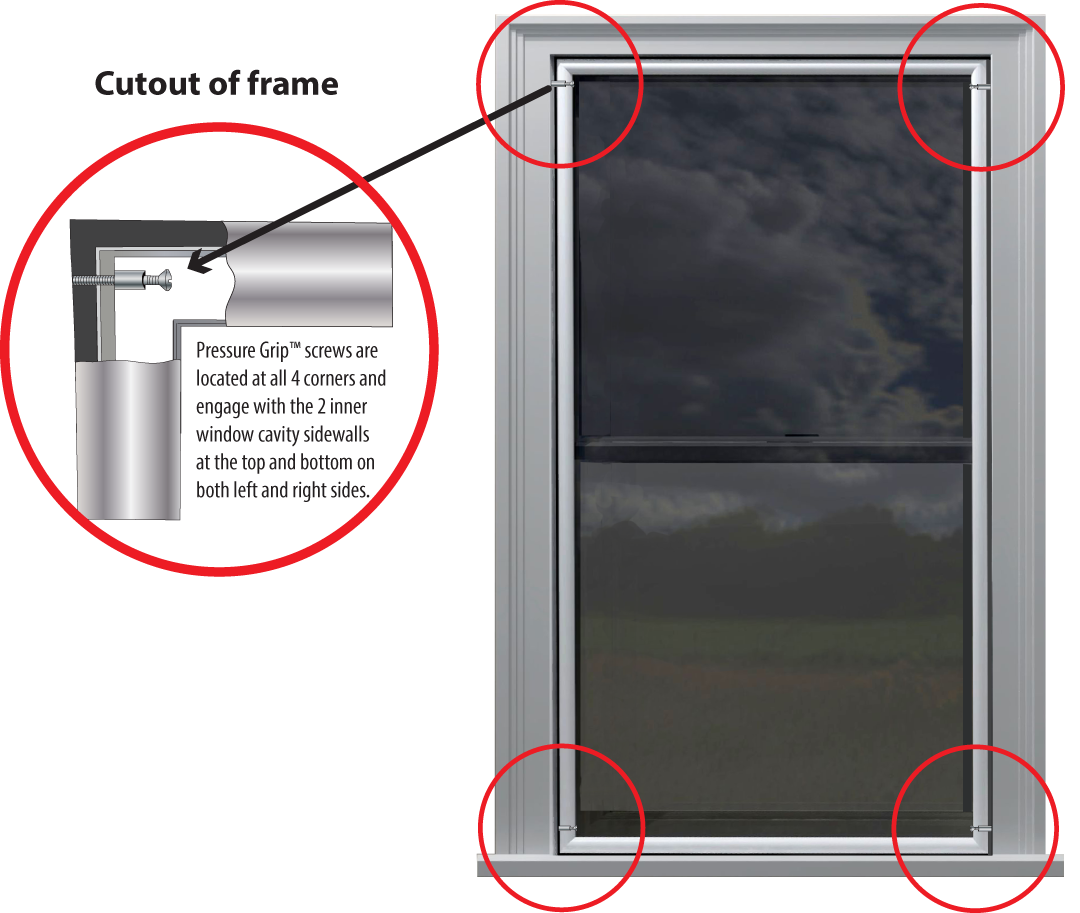
To keep your Storm Snap™ nicely in place, and avoid your Storm Snap™ falling out, tighten the 4 Pressure Grip™ side screws. These side screws grip your frame onto your window cavity. Using a Phillips head screw driver, lightly tighten the Pressure Grip™ screws on all 4 corners of your frame BEFORE installing your lens. These screws hold your Storm Snap™ in place by pressure and don’t require holes in your window frame cavity. Don’t over-tighten screws.
During higher wind events, leaky outside exterior windows can build up air pressure in the window cavity and exert pressure on your Storm Snap™, trying to push it in. Proper tightening of the 4 side Pressure Grip™ screws will prevent this (Patent Pending).
Step 4
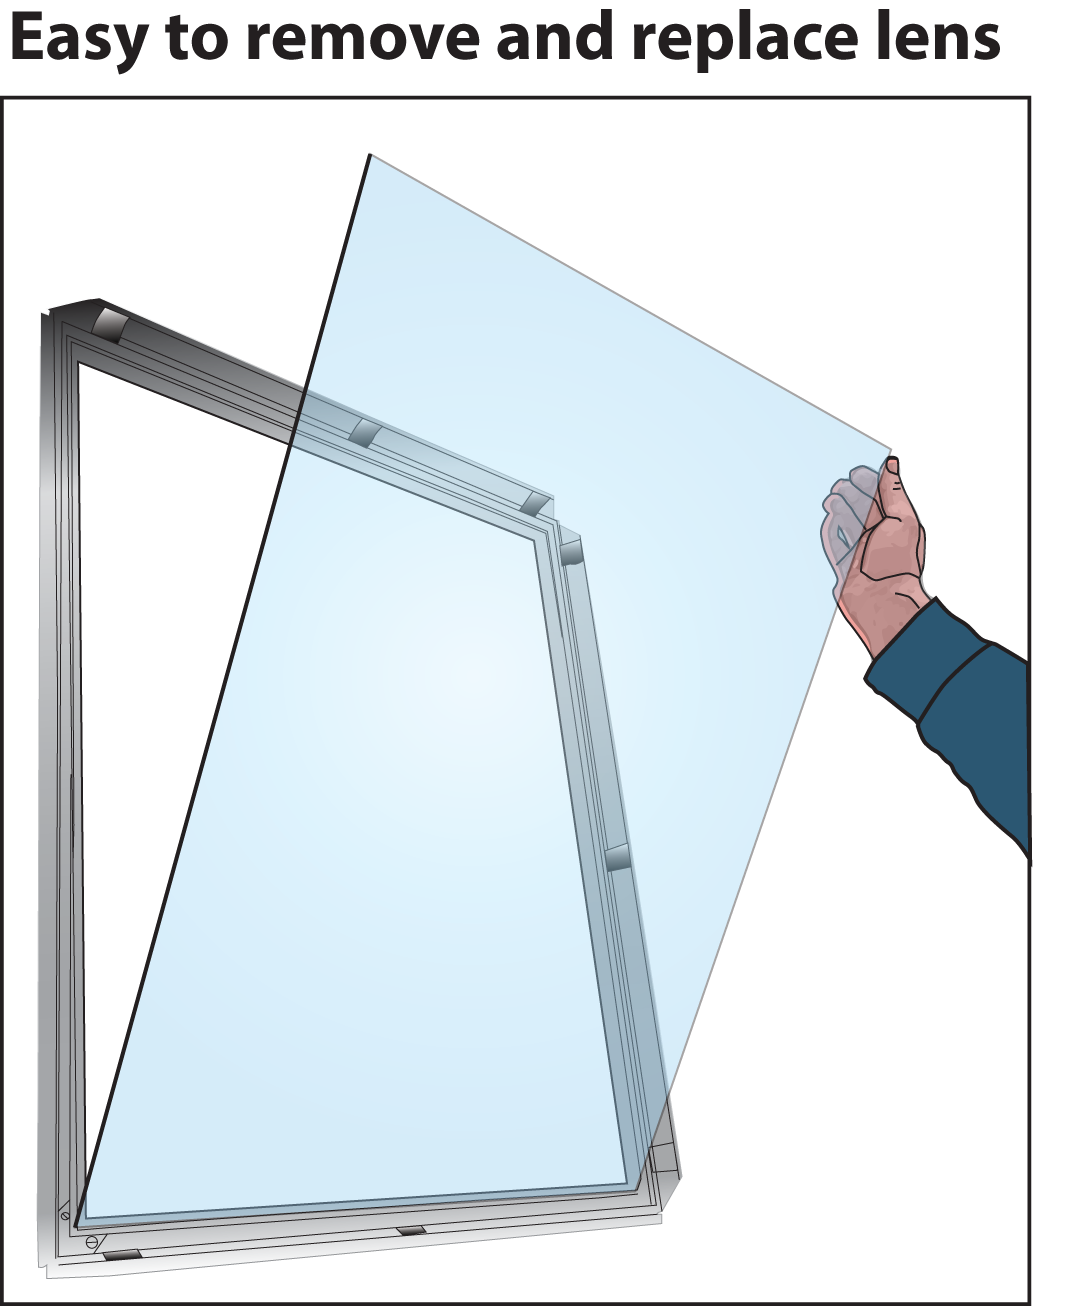
Before peeling off the protective sheeting on your lens, make sure it’s the correct lens for your frame by installing it in the Storm Snap™ lens cavity.
Peel off the protective sheeting from both sides and insert lens into the Storm Snap™ frame. Make sure LENS is fully seated in the frame bottom.
Gently snap down all 4 frame edges and you’re all set!
Exterior “OUTER1.25” frame Mounting Options
Two ways of mounting below.
For Exterior, frame width is 1.25”
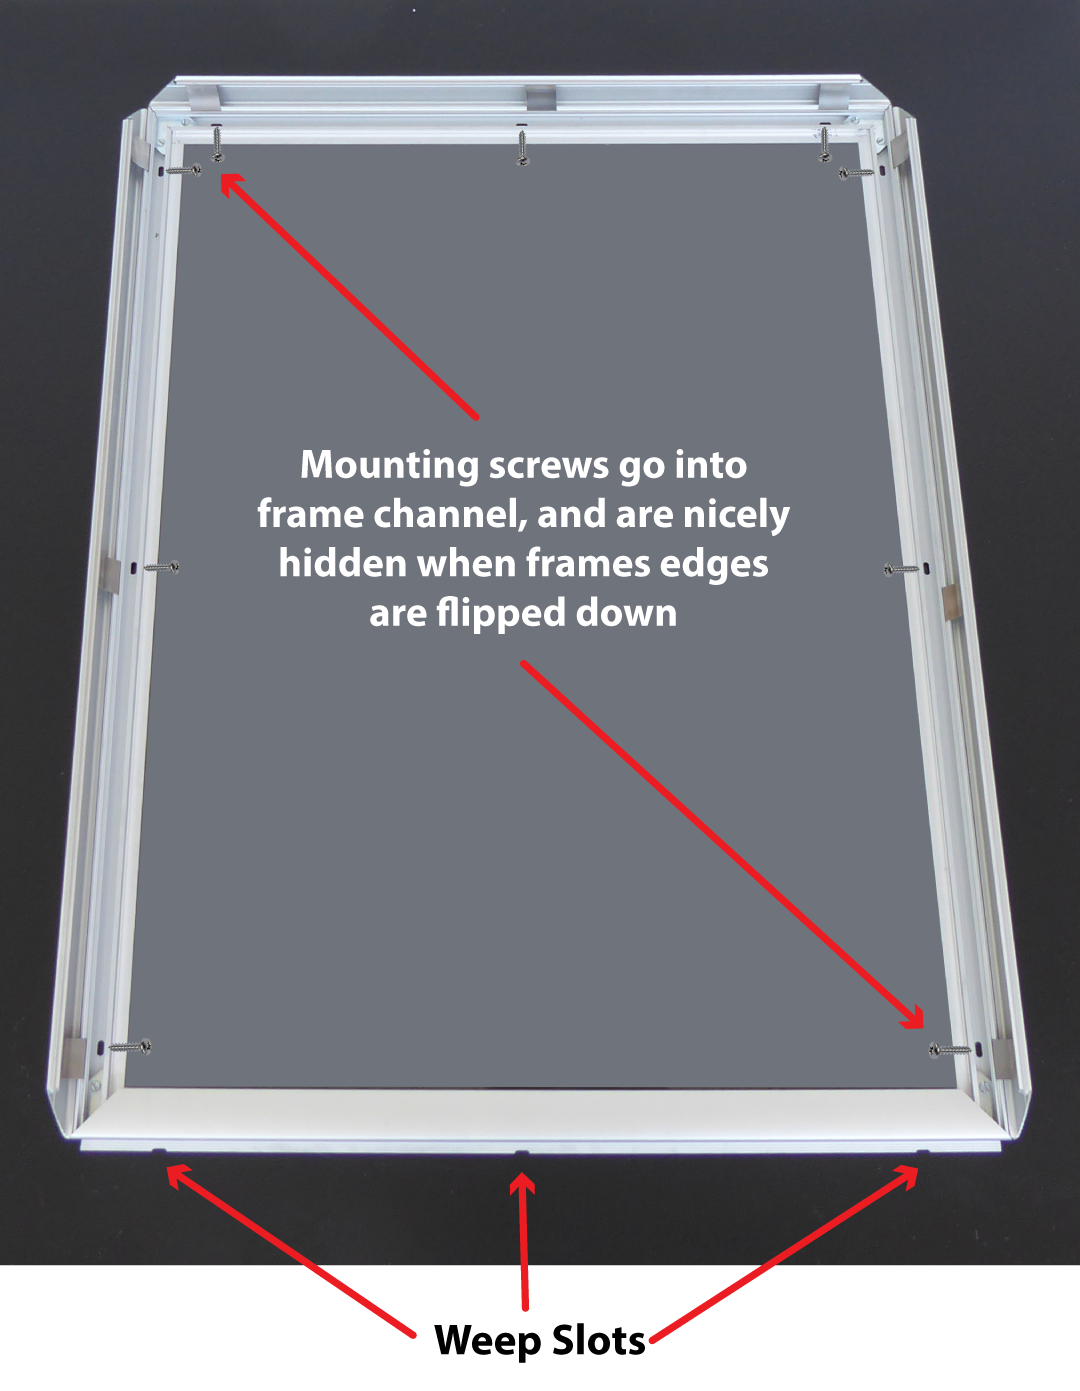
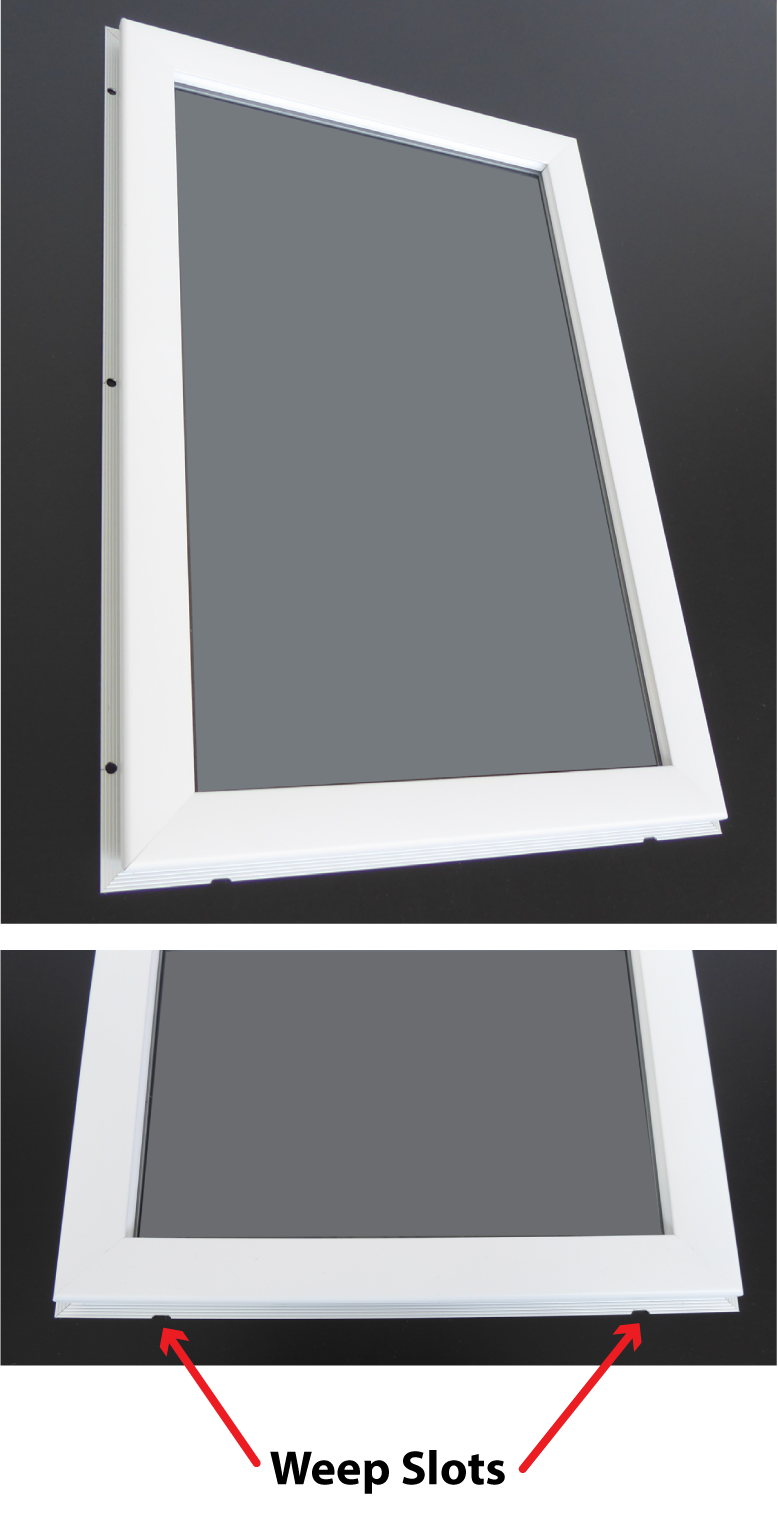
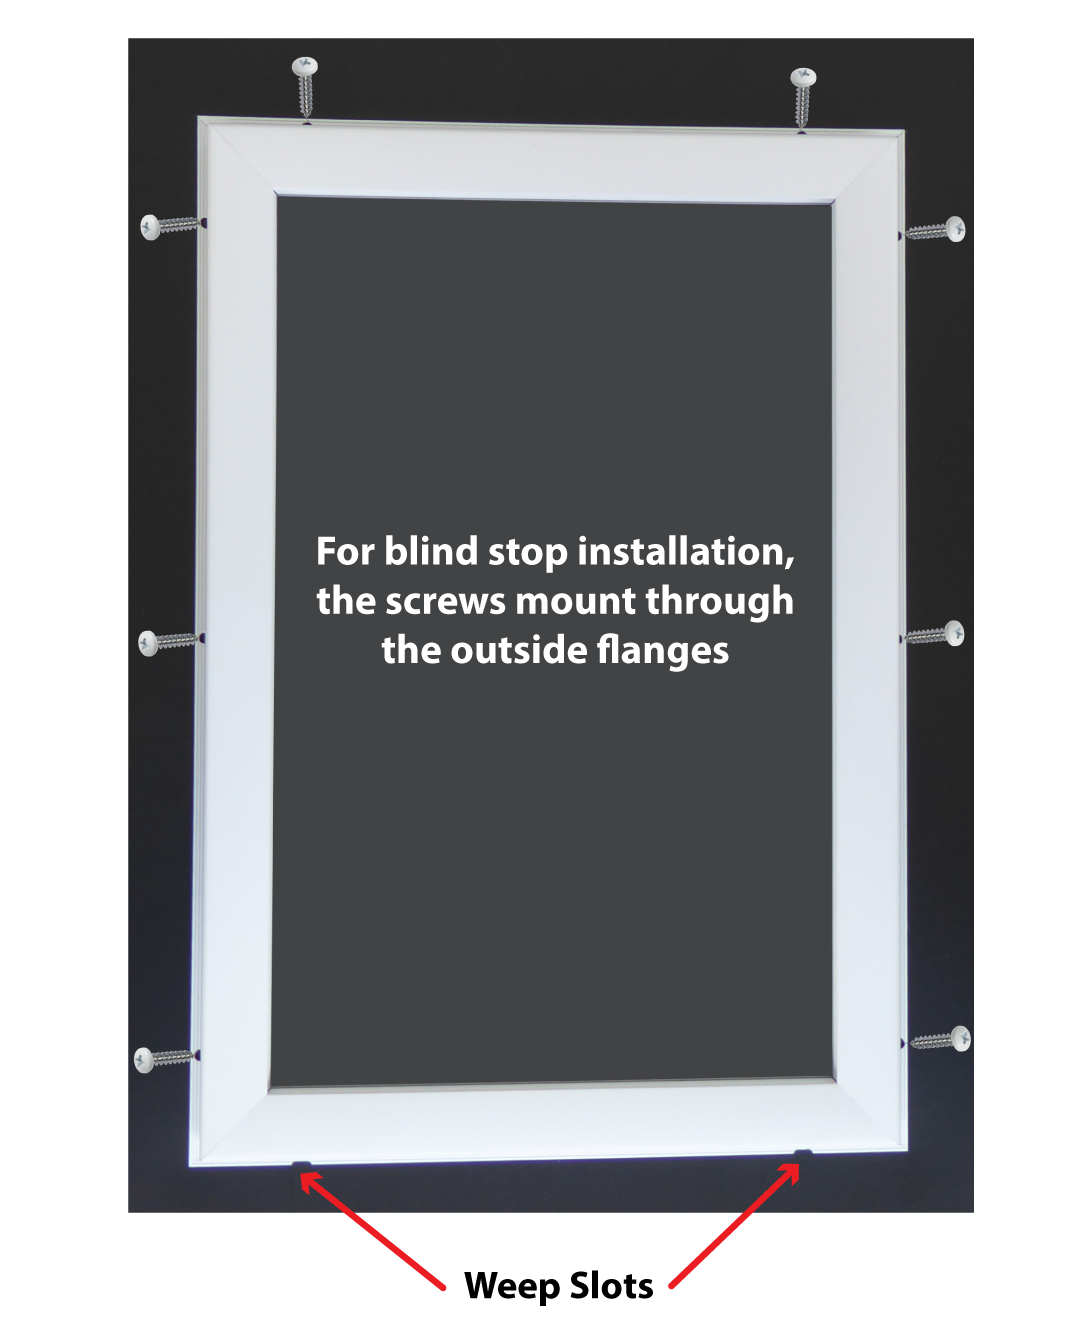
For ALL exterior mount Storm Snaps™, the bottom of the frame rests on or is level with your window’s SILL. The bottom of the frame has weep holes to allow any condensation or moisture to escape. This is mandatory for all exterior storm windows, regardless of manufacturer.
Exterior Mount Measuring
(Do not use Inside/Inner mount Storm Snaps for Exterior mounting)
Four ways of mounting/measuring Storm Snaps™ for exterior windows.
For Exterior, frame width is 1.25”, 1” wide is not an option for exterior.
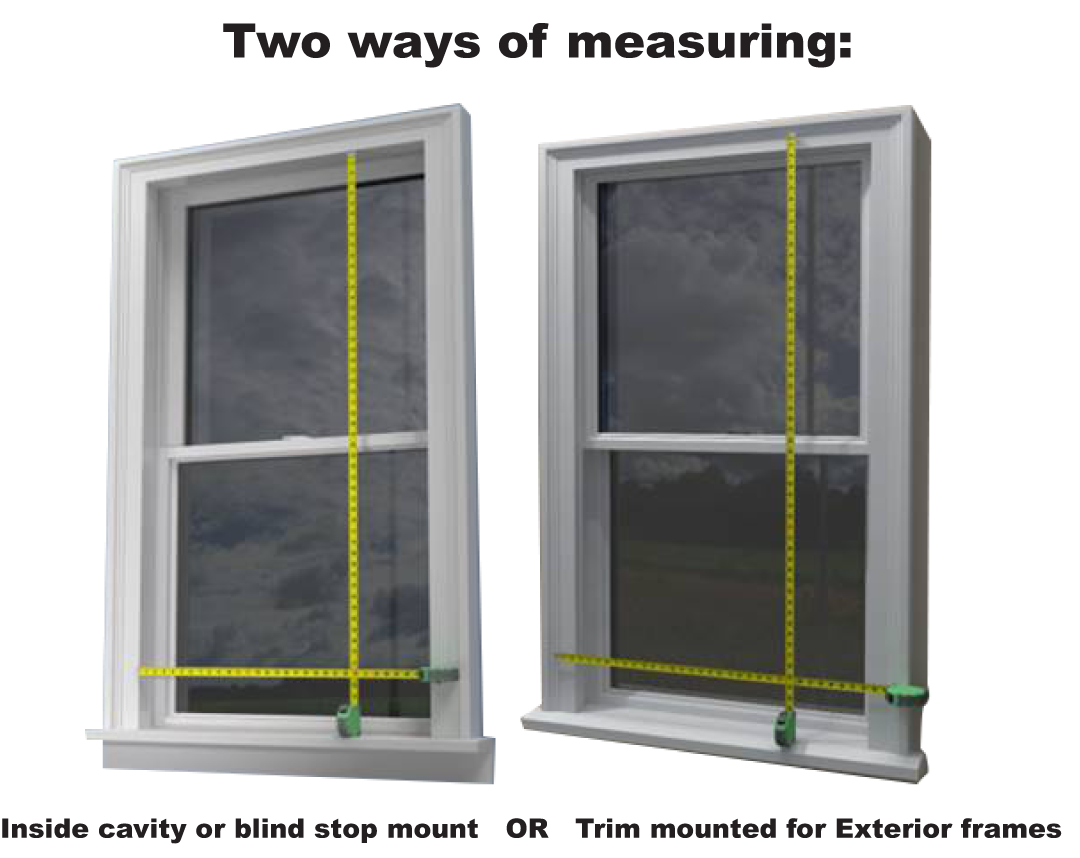
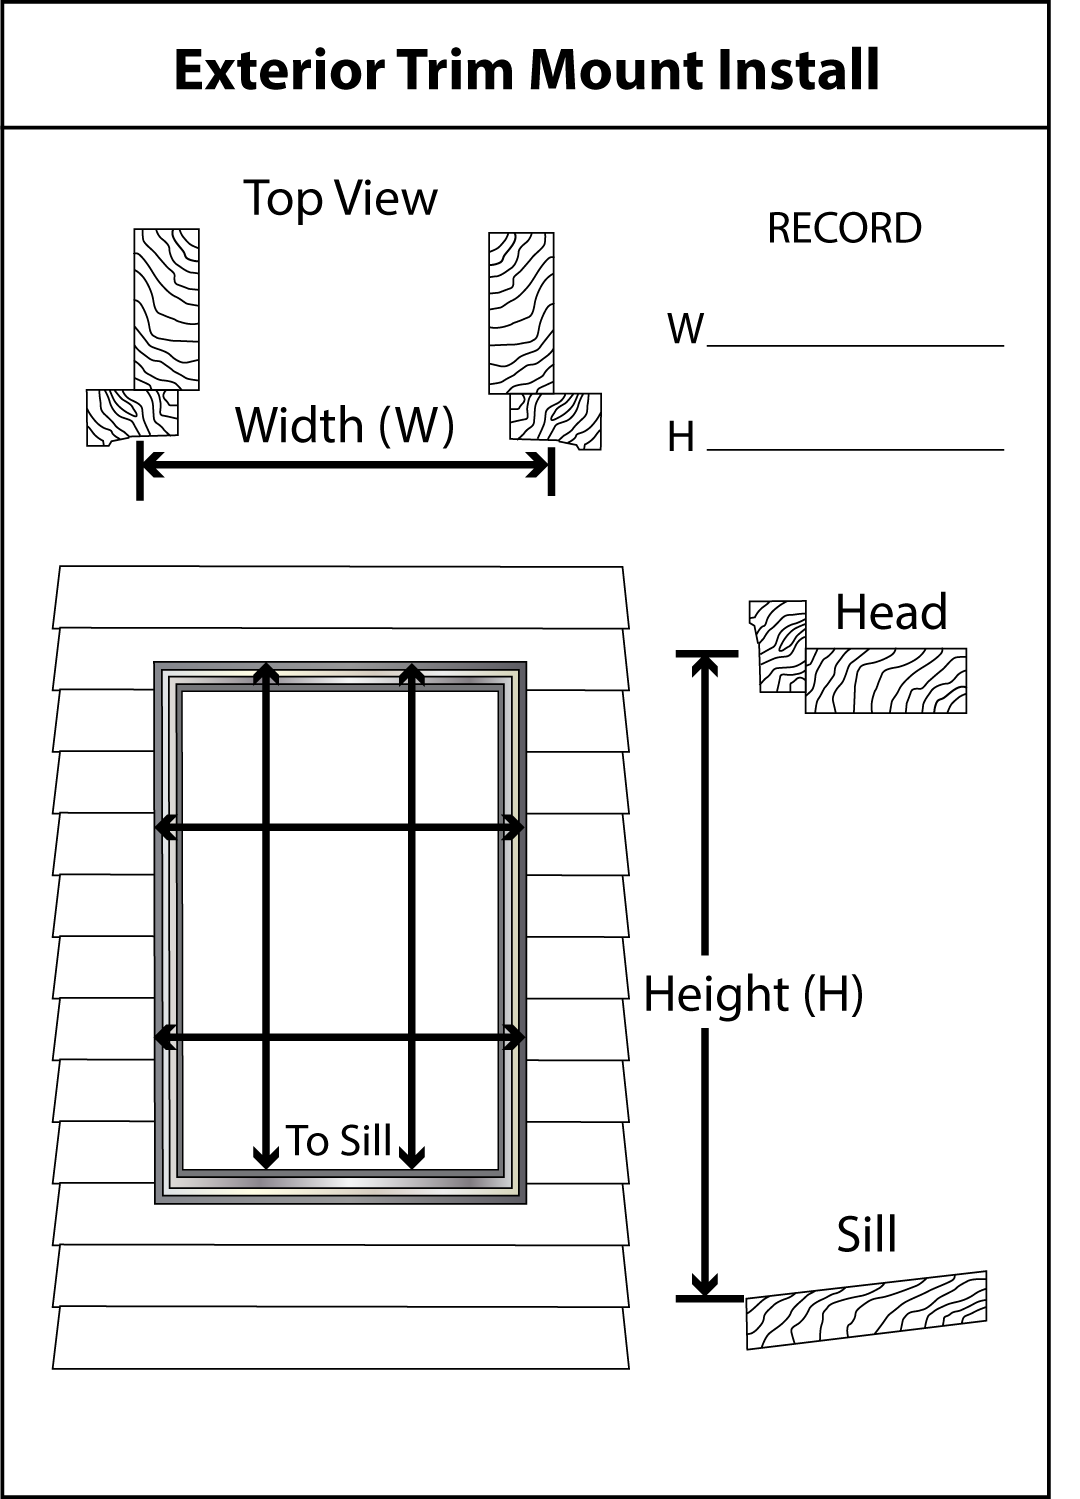
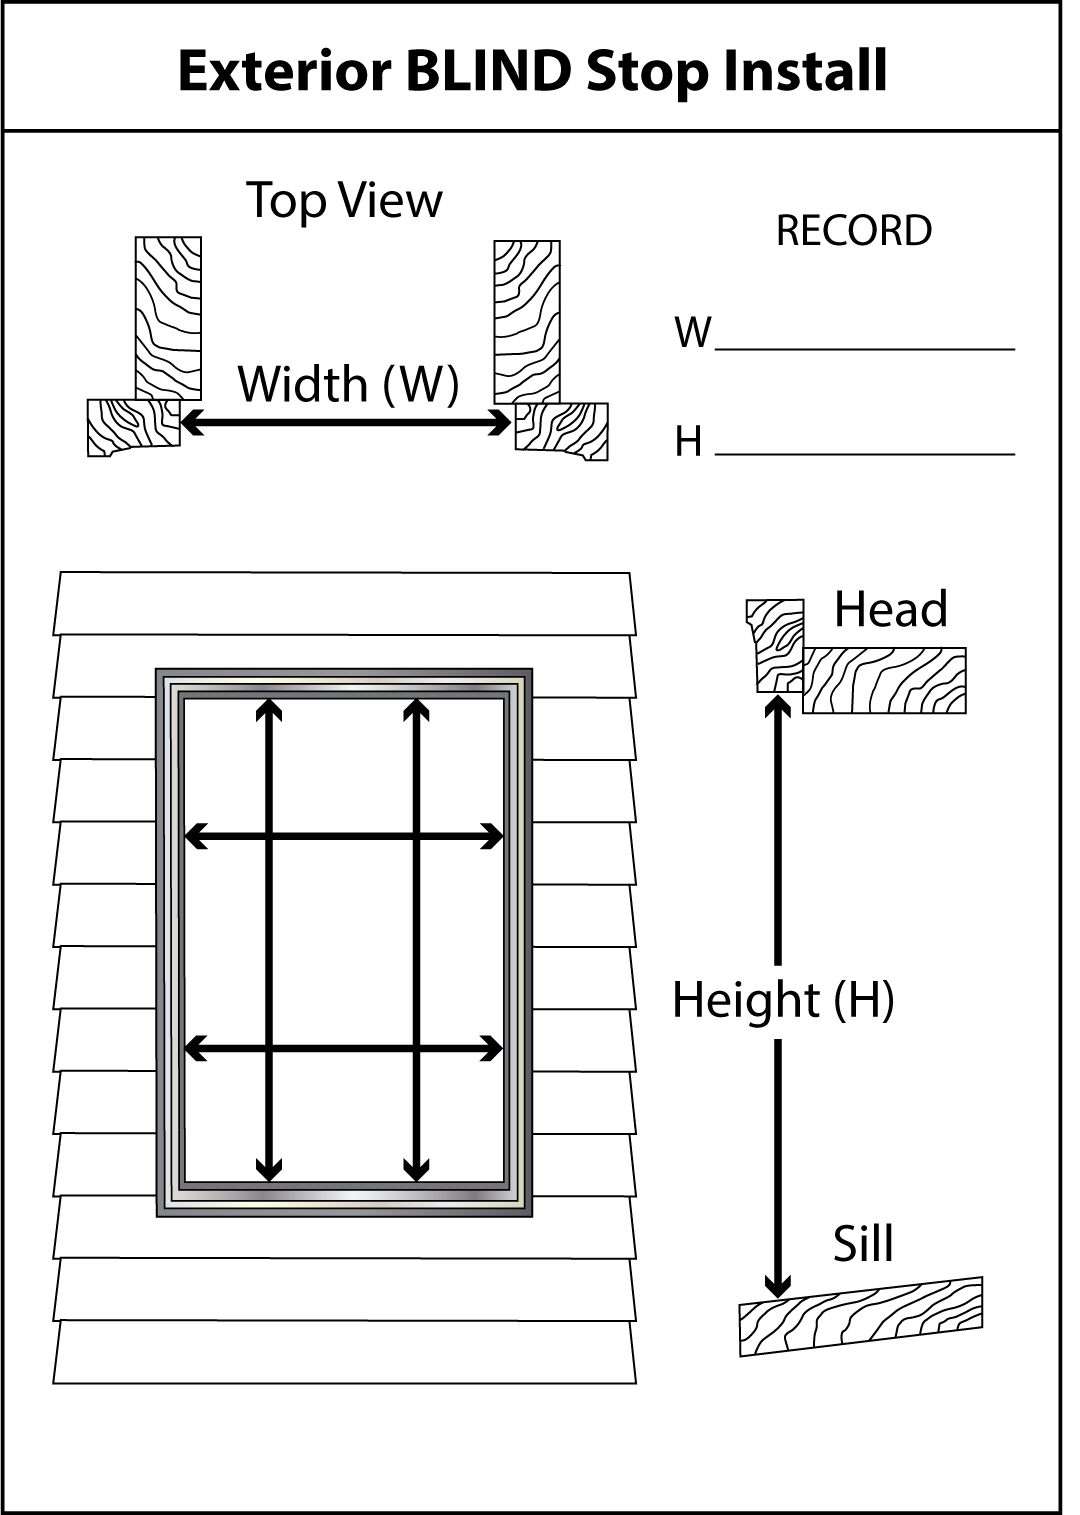
You will measure either the OD (outer dimension) of your outside trim or the cavity of your exterior window. You will mount your Storm Snaps either on your trim, or on your exterior blind stop ledge. See below for details on how to measure.
Measure top, middle and bottom for width and height. Round down to the nearest 1/16” Measure carefully !
4 WAYS TO MEASURE FOR EXTERIOR FRAMES, AND 2 FRAME OPTIONS:
Exterior frames are best trim mounted if you have a flat 1.50” or wider trim, otherwise Blind Stop mounted. Impact Frame can only be ordered for TRIM mount, either 4 sided or 3 sided.
Definition of Sill: bottom of your exterior window frame, slightly angled down to drain water away from window.
-
Option A: Cavity measure for TRIM MOUNT: You provide us the measurements for your window cavity.
For TRIM Mounting, you must have 1.50” of flat trim on top, left and right sides all around your window cavity. We will make a frame that will fit around your window cavity and screw into your outer trim. The “open or viewable area” of your frame will basically match your cavity opening. The bottom of the frame will rest upon your sill and has weep slots for moisture release. - Option B: Outer Dimensions (OD) of Frame for TRIM MOUNT: You carefully provide us the exact OD size of the frame you want for your trim mount. The resulting “opening” size on the frame will show when you enter the data below. For the best appearance, the “opening” of your frame should basically match the cavity of your window.
- Option C: Cavity Measure for Blind Stop: You provide your Cavity dimensions. For Blind Stop, you must have a minimum of 1⁄2” projecting blind stop ledge. From your cavity measurements, we’ll make the frame OD (outer dimension) 1/8” less in width and height so that the OD of your frame will have about a 1/16” space all around to fit into your Cavity opening and screw into your blind stop ledge.
-
Option D: Outer Dimension (OD) of Frame for Blind Stop: You provide the OD size of the frame you want.
Ideally, you should make the OD of your frame for blind stop installation 1/8” less than your width and height dimensions. This will give you about 1/16” clearance from the sidewall of your window cavity.
The 2 Frame Options will be whether you want a 4 sided frame or 3 sided frame. What’s the difference ?
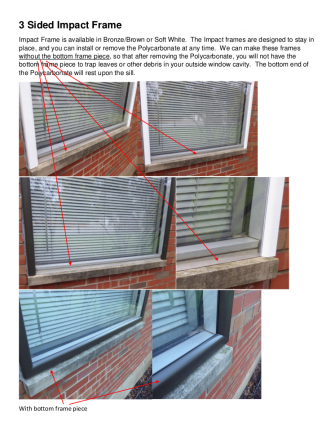
For OUTER Trim or Blind Stop frames, Or the Impact frame, you have the choice to make it a “3 sided” frame, with no bottom piece. (for an idea of what we’re talking about, see pictures under “Impact Frames -3 sided Impact Frame”).
We can make any of the Exterior frames without the bottom frame piece, so that after removing the LENS, you will not have the bottom frame piece to trap leaves or other debris in your outside window cavity. The bottom end of the LENS will rest upon the sill. The main reason for making the frame this is way is if you don’t plan on having the LENS installed all year. When you remove the lens, your window will be totally un-obstructed and nothing on the sill.
A 4 sided frame will have the bottom frame piece and weep hole flange at bottom. The frame is meant to keep the lens in place all year. If you remove lens, the “open” cavity will trap leaves and debris at the bottom, on your sill.
A 3 sided frame doesn’t have the bottom frame piece for a more “invisible” view on your window. The bottom of the lens simply rests on the sill. If you wish to remove the lens seasonally, because there is no bottom frame piece, leaves and debris will not get trapped at the bottom sill. For Blind Stop, you must have a minimum of 1⁄2” projecting blind stop ledge on top, left and right sides. The lens bottom itself will not have any “weep slots.” Any moisture is likely to weep out under the lens sitting atop your sill.
Exterior mount Storm Snaps™ installation
OUTER1.25 frame
You should only install exterior Storm Snaps™ if you have basic carpentry/handyman skills for a safe and nice installation.
Step 1
Carefully unpack your frames. Your lens has protective sheeting on both sides, don’t remove it until lens is ready to install.
Make sure you have the correct size Storm Snap™ and lens for your window.
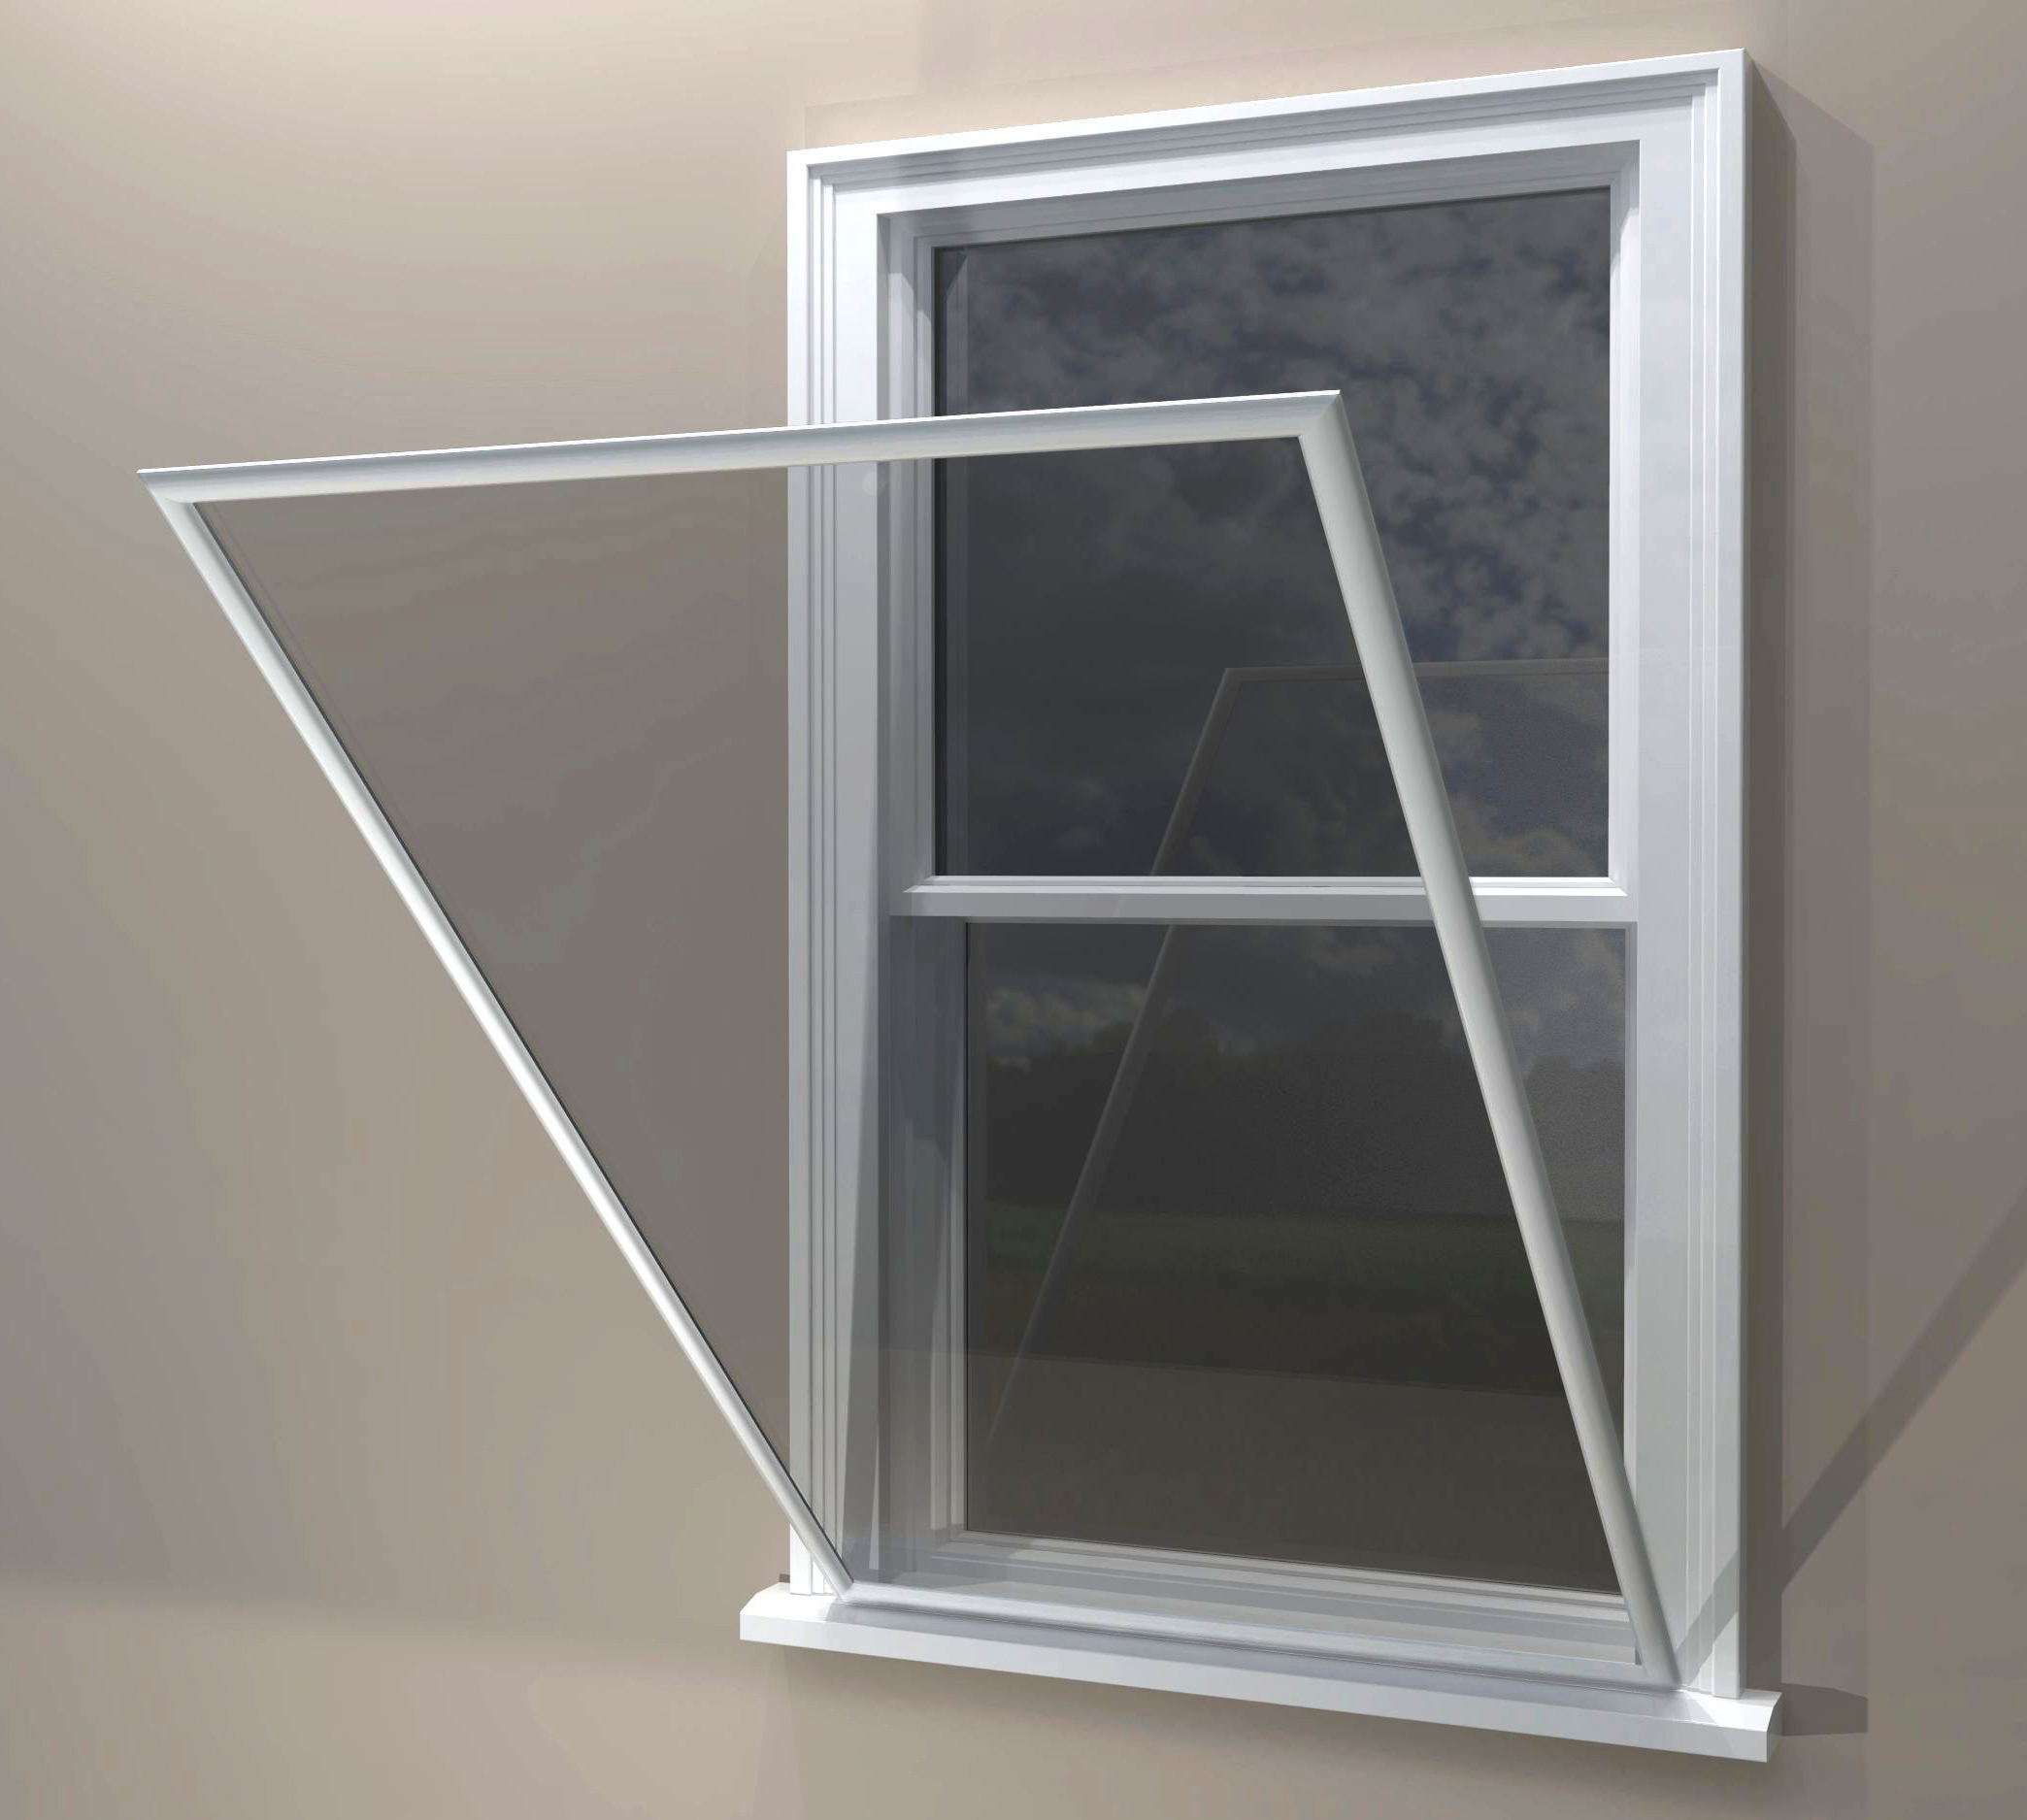
Step 1 Without lens installed, align frame only on your exterior window trim or blind mount ledge. Make SURE that the bottom flange with the weep holes is at the bottom resting on top of or meeting at your sill. Do not let the flange go over the front of the sill. The weep holes will allow any condensation or water to weep out if it gets in.
Step 2
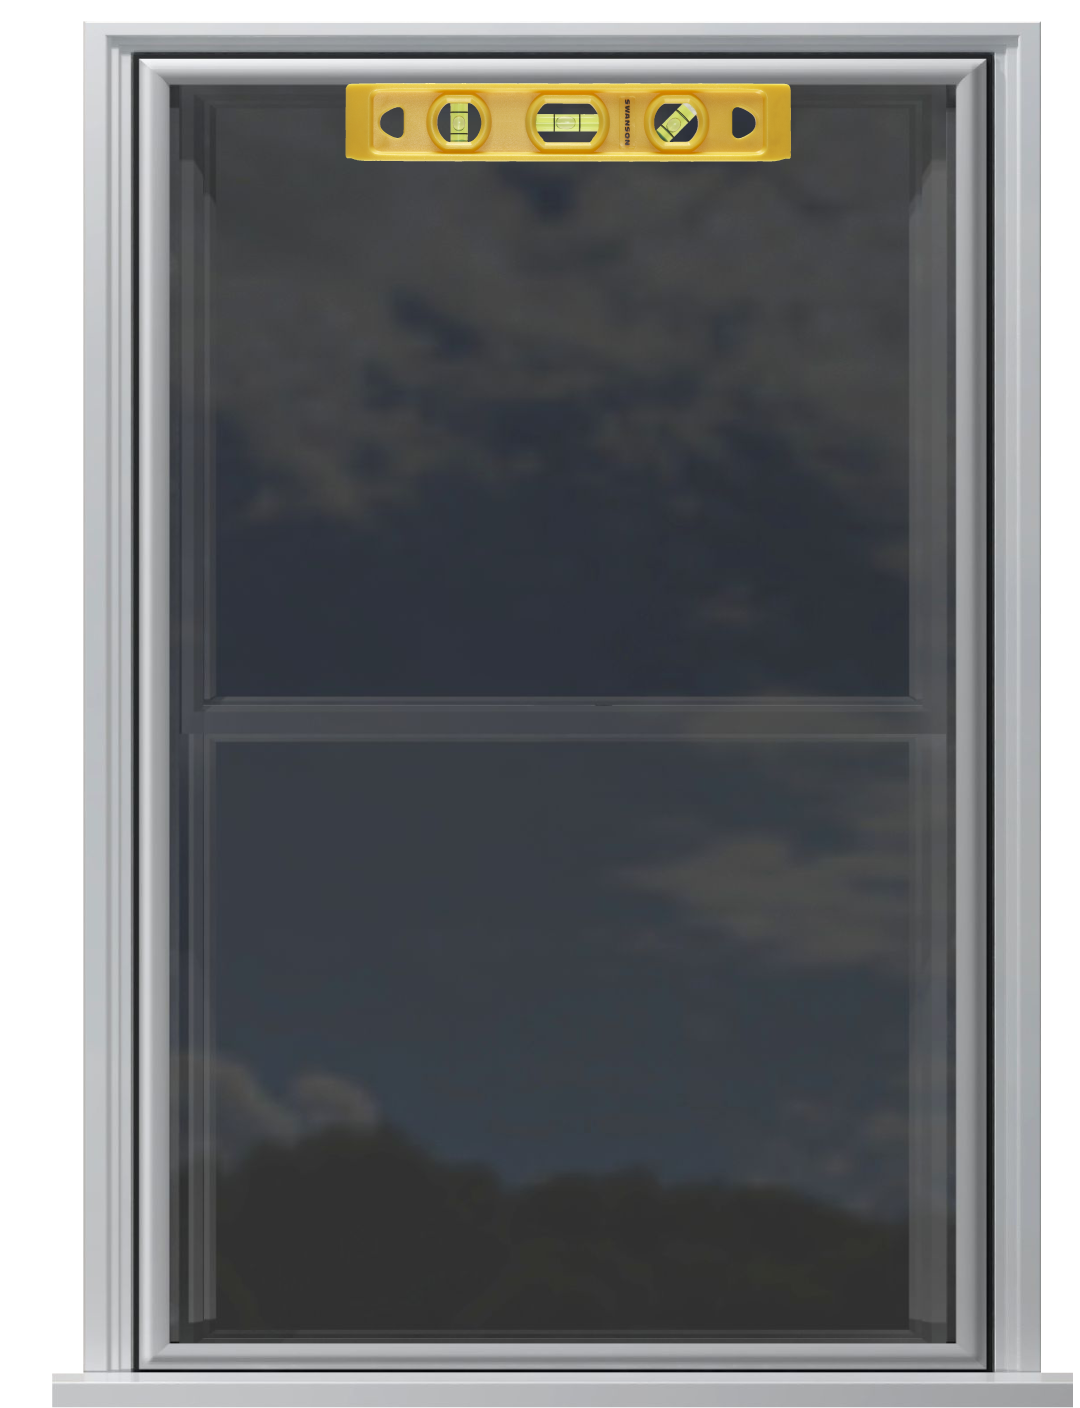
Use a level to make your frame is mounted straight. Flip open the frame edges to gain access to the mounting holes in the channel, OR if blind stop mount, you will screw via the edge holes in the flange.
Using #6 sheet metal screws in the holes provided, screw the frame to your exterior window trim of the blind stop ledge. You can add more holes if you wish.
Step 3
Before peeling off the protective sheeting on your lens, make sure it’s the correct lens for your frame by installing it in the Storm Snap™ lens cavity.
Peel off the protective sheeting from both sides and insert lens into the Storm Snap™ frame. Make sure LENS is fully seated in the frame bottom.
Gently snap down all 4 frame edges and you’re all set! Make sure all 4 corners are pressed down. Wiggle them a bit as you’re pushing down for best appearance.


